Countary
Countary offers everything you need to create and manage budgets. It runs on any desktop computer that can run JavaFX (see https://openjfx.io/). If your bank provides exports of statements in OFX format, then you can use Countary!
This project is maintained by hoogenbj
Budgets
Countary supports three kinds of budgets: Monthly, Annual and Ad hoc. Having
a monthly budget is perhaps not unusual. Most self-help literature that mention budgeting
refers to having a budget for your monthly income and expenses. I have yet to come
across any that suggest budgeting for annual expenses - let alone ad hoc expenses! And
yet, I am convinced you need all three kinds if you are going to be successful in
your endeavour.
Once you have your annual and monthly budgets you don’t need to start over for a new
month or year. You can simply Clone a budget and add new items or remove items that
are no longer relevant. Scroll down to find out more about cloning a budget.
Annual budgets
There are certain kinds of expenses that only happen once or perhaps a few times a year. If you do not budget for those, they will come as a shock. It can be a tremendous confidence boost to plan for and have the money available for those less frequent expenses when they come around!
For example, take a look at the annual budget in the Demo database (click to make it bigger):
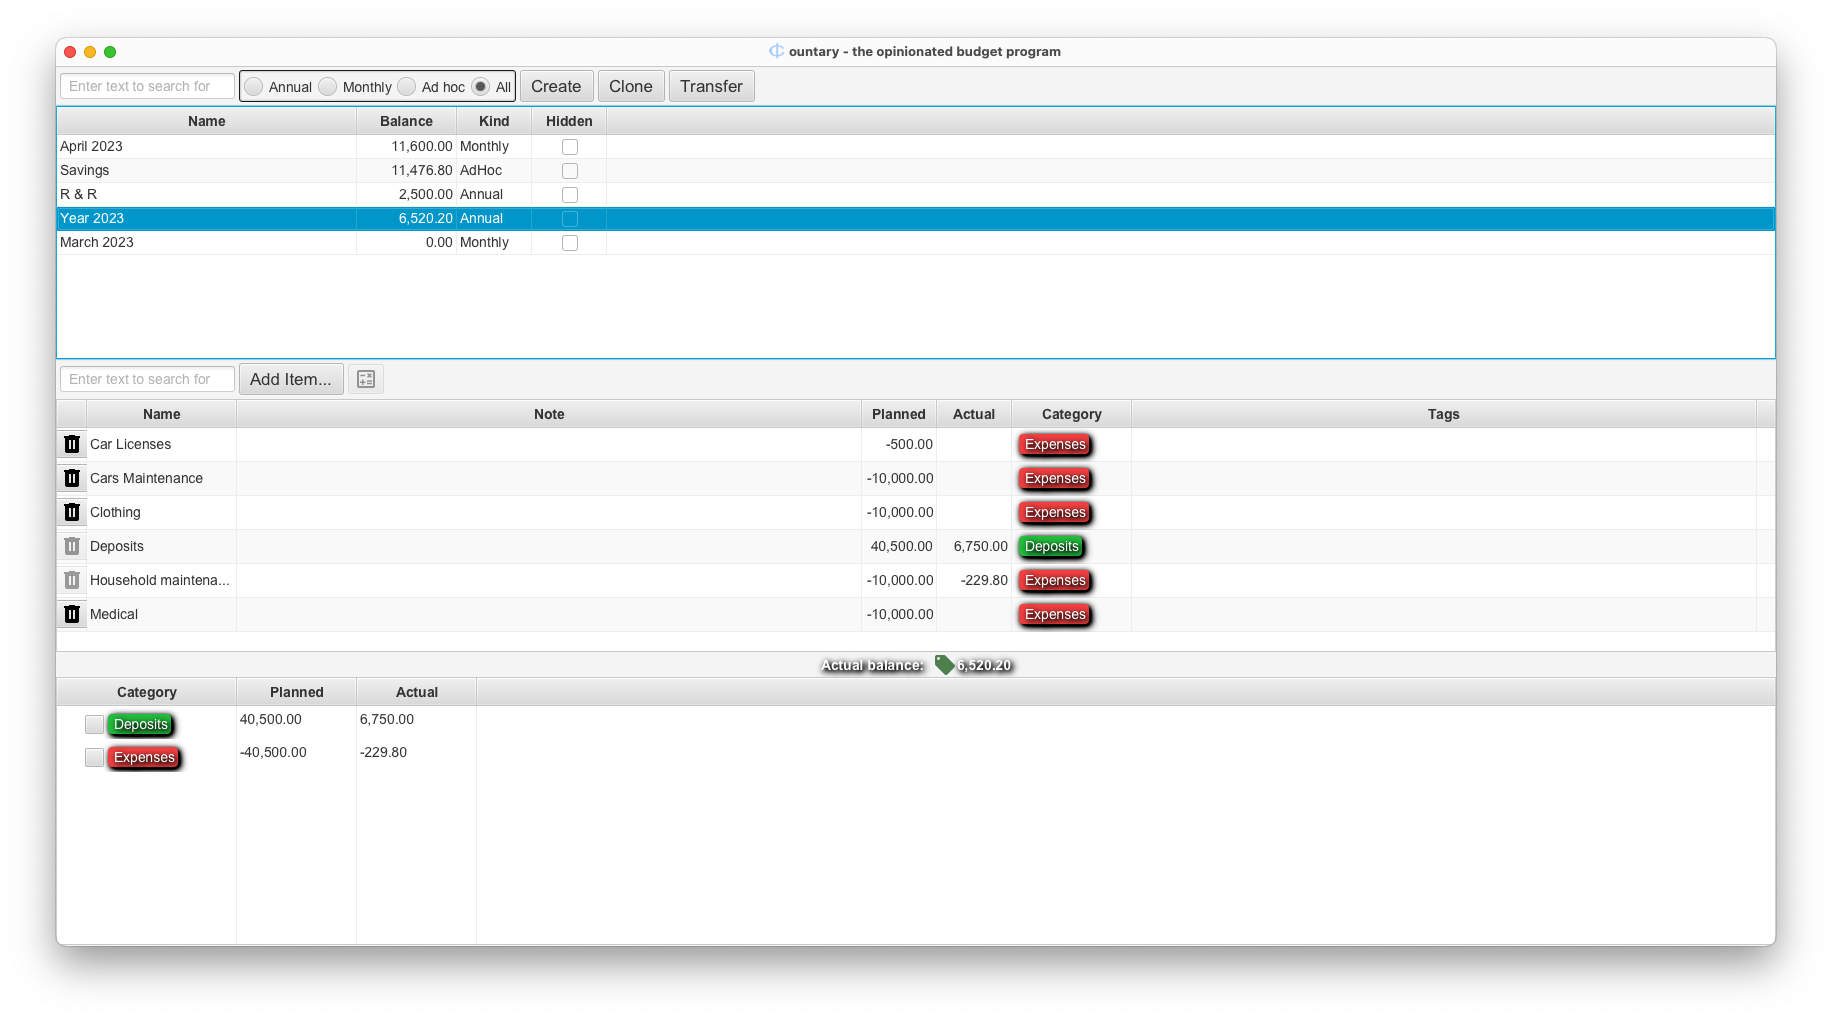
You probably don’t buy clothing every month, or, if you do, perhaps for different members of your family. Better to budget for it on an annual basis. Similarly, you don’t service your car every month. Once you put these items in a budget with what you estimate you will need to spend, you can easily calculate what you need to put away every month.
Just select all the items (except for deposits) and click on the  icon. You’ll see a dialog popup with the results of the most common calculations (click to make it bigger):
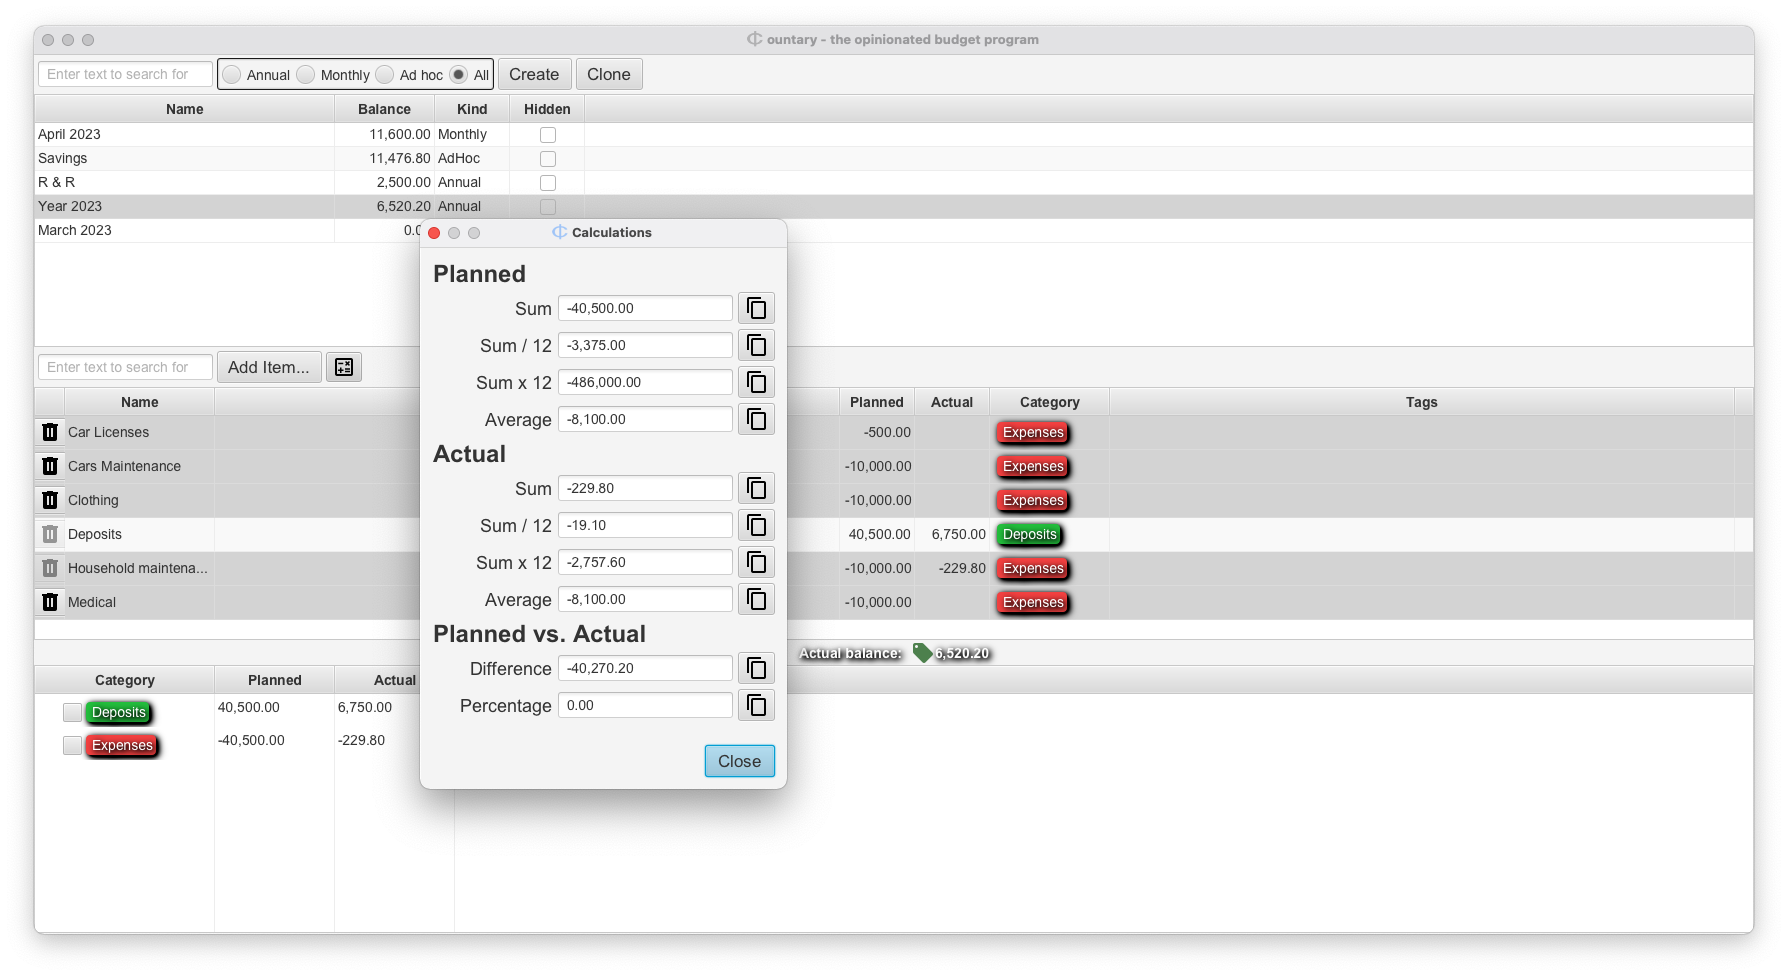
The result you are looking for is the Sum / 12 one. This tells you how much you must
put away every month to make sure you have the money available when you need it.
You can easily copy any of the calculated results by clicking on the  icon.
icon.
Have a look at the other budgets in the Demo database to get a feel for things.
So how do you allocate funds to the different budgets? Here’s an example from the
Demo database (click to make it bigger):
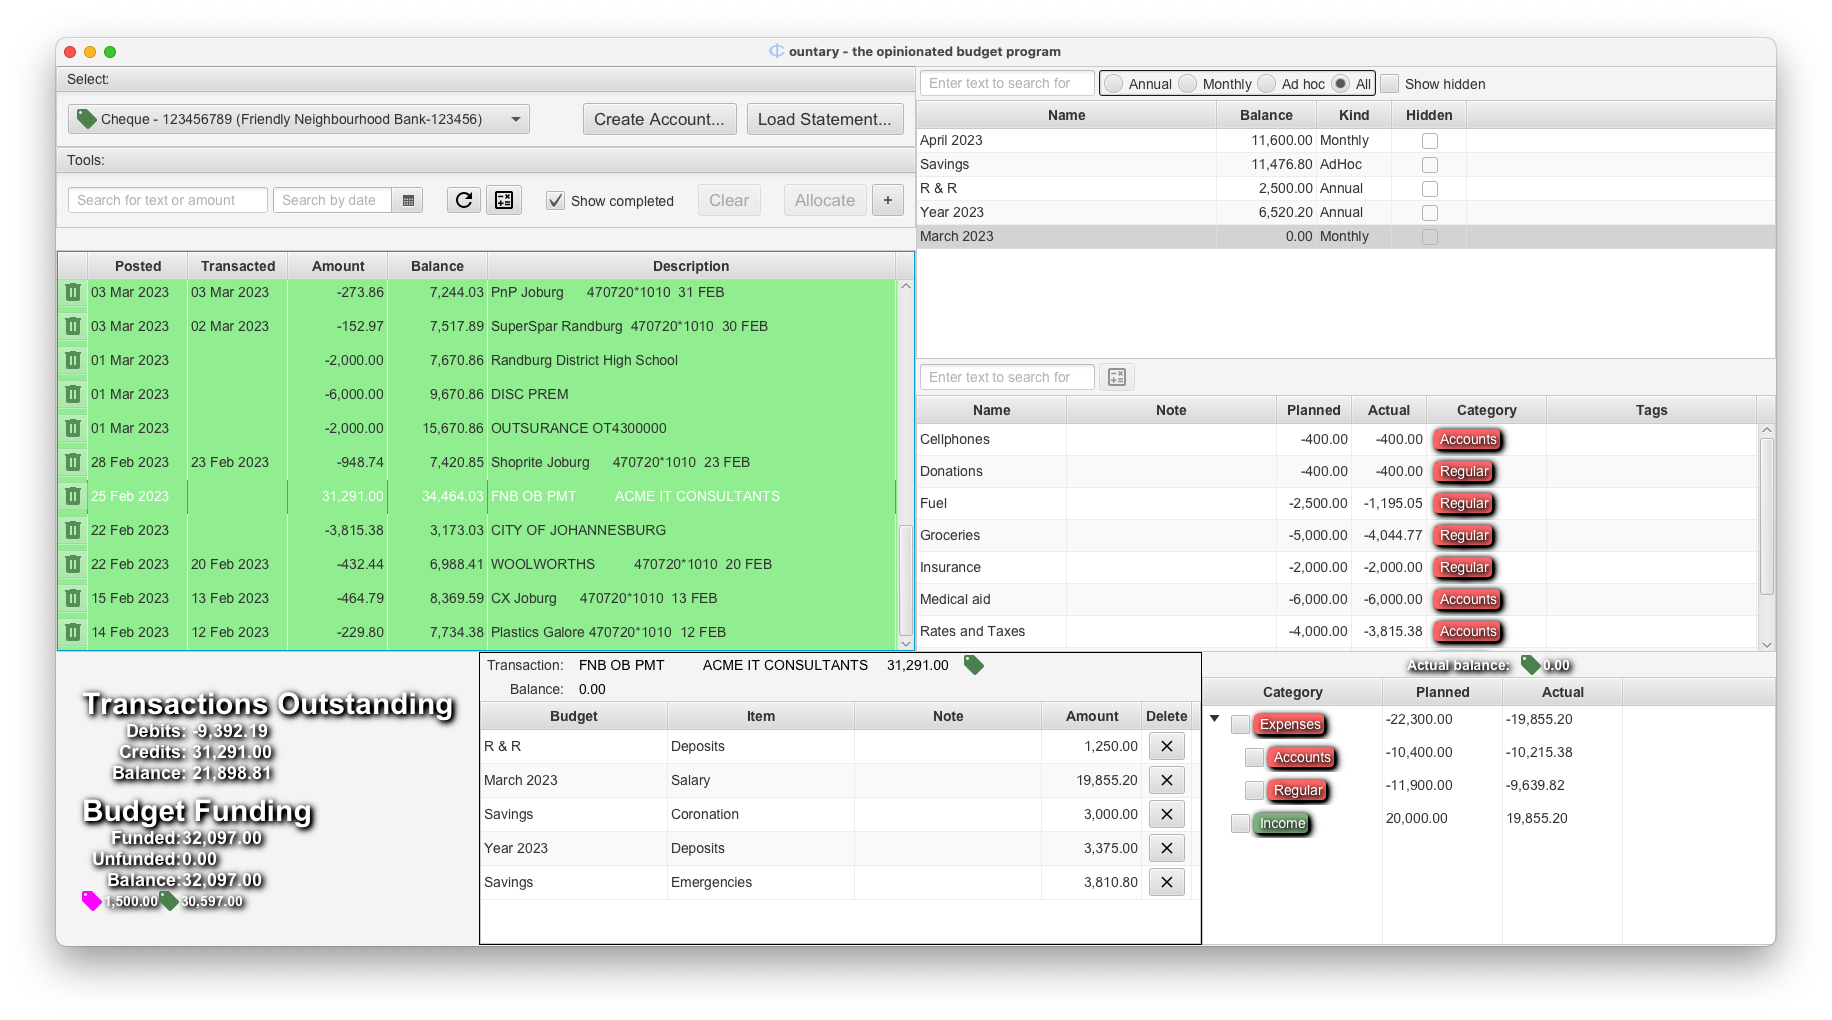
The screen may seem a little busy at first. Take some time to study it. On the left it shows all the transactions for one of the accounts in the Demo database. You will notice that the check box Show completed is ticked. That is how you can see the transactions that have already been allocated, because transactions that are fully allocated normally disappear from view.
On the right you can see a list of all the budgets in the Demo database and that one of those, the March 2023 budget, is selected. Below that you can see all the items for the selected budget and below that, the categories of the items as a summary view.
The next thing to notice is that the transaction from Feb 25, 2023 is selected. That is a salary deposit. The smaller window in the bottom centre part of the image shows how the deposit amount is divided between five different budgets. So this is how money is divided among the different budgets. It is also an example of a single transaction allocated to more than one budget.
The secret to making all of this work is that absolutely every transaction in your bank account needs to end up somewhere in one or more budgets. Otherwise, your account will leak money and eventually it will become a hemorrhage, and you will lose complete control.
If you really don’t have a place for a transaction at least allocate it to an item
called unplanned in your monthly budget, so you can see the effect. This will
stop you from spending money you don’t have.
Ad hoc budgets
You will use an Ad hoc budget for expenses that come around once in a lifetime, or
maybe only every couple of years. Such as buying a new motorcycle helmet (those should
be replaced every 5 years!) or maybe a new washing machine. Or perhaps you need to save
for your child’s university education. Set up the budget and estimate how many months
you have before you need to start spending the money. Divide that into the total and you
will have the amount you need to put away every month to save for it. It is still worth
doing if you can only save for a part of the full sum.
Monthly budgets
Monthly budgets are covered last not because they are less important, but perhaps they are emphasised too much.
Let’s look at the transactions worksheet as it looks like when you first open the
demo database. (If you don’t know yet how to open the demo database go here).
Click on the image to make it bigger:
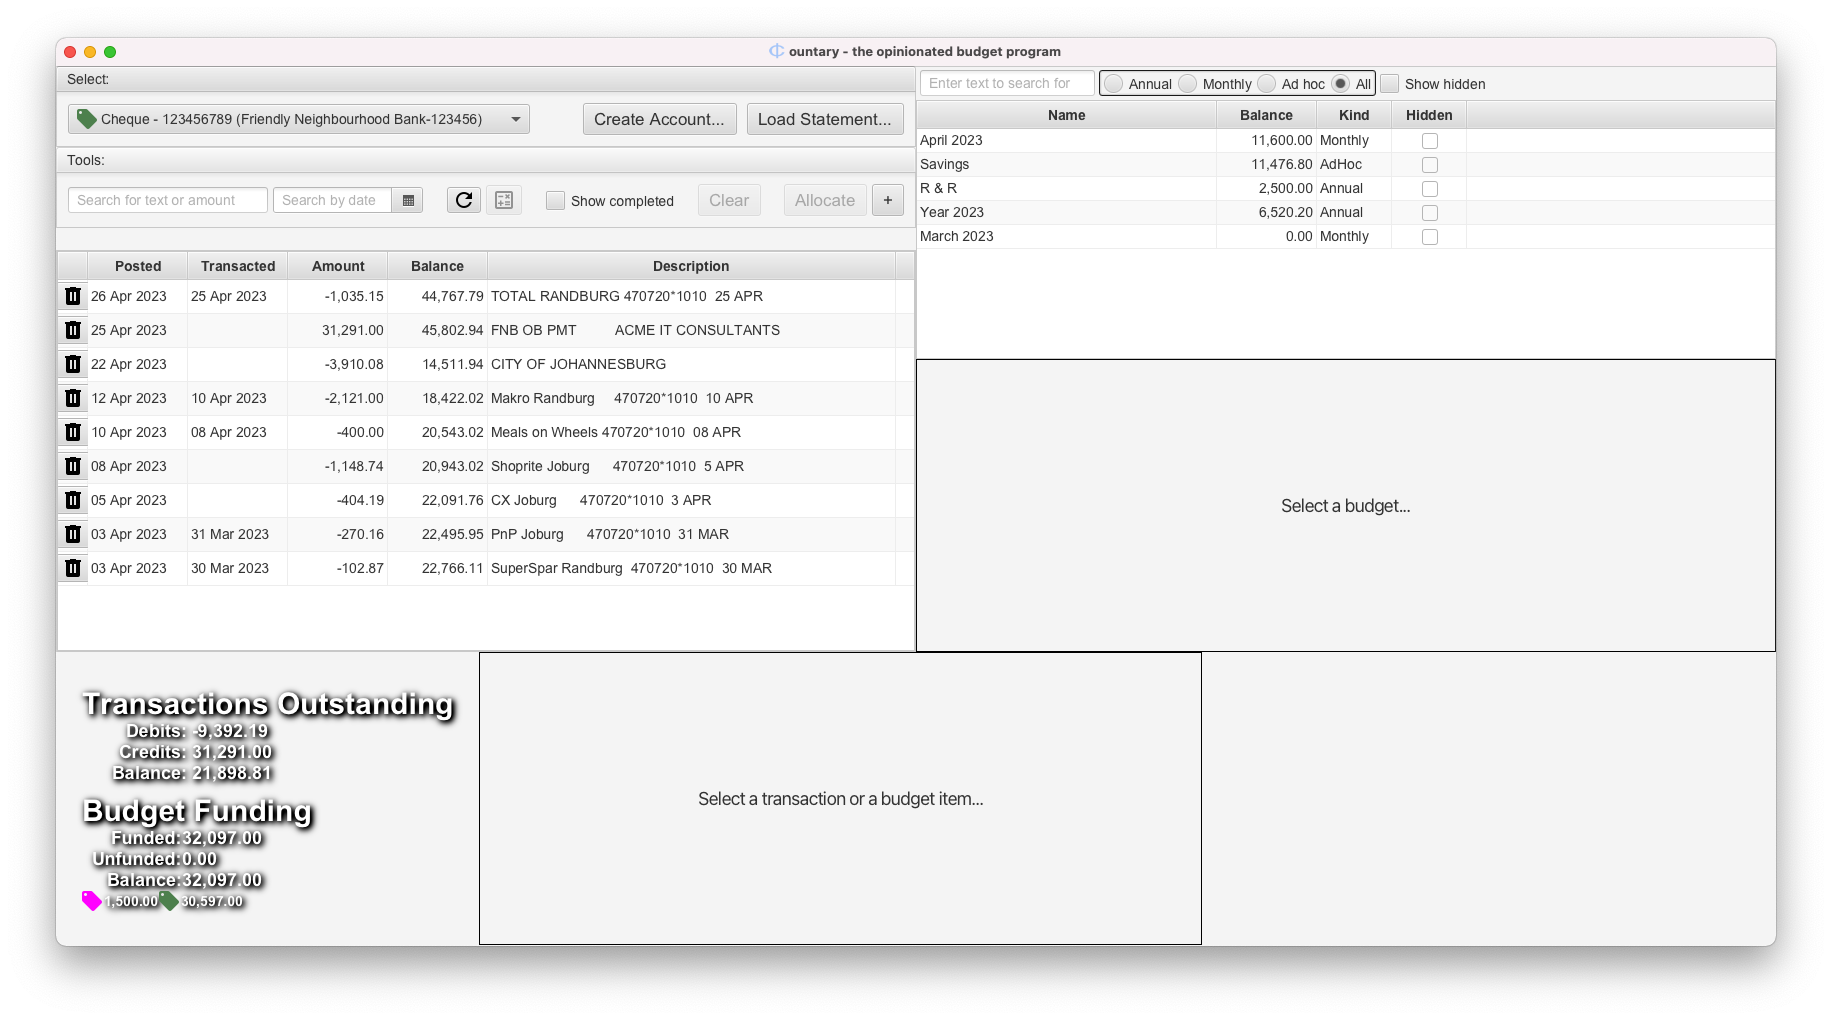 Here you can see a number of transactions of the currently selected account that have yet
to be allocated. Transactions can come from two sources: bank statements or manual entry.
It would take too much time and effort to add transactions by hand, so importing
transactions from a bank statement is the way to go. To learn about importing bank
statements, go here.
The objective now is to make all transactions disappear by allocating them to the different budgets. But first, you should know where the transactions come from when you do your own budgeting. The best way to do that is to keep the receipts for everything that you buy. Write a little note on each receipt to make sure that you remember what it was for. That way you’ll know for sure what item to allocate the transaction to.
The demo database makes it easy for you to see how it can be done. Select the March 2023
budget and click on some items. Here you can see what happens when you click on the
Groceries item (Click on the image to make it bigger):
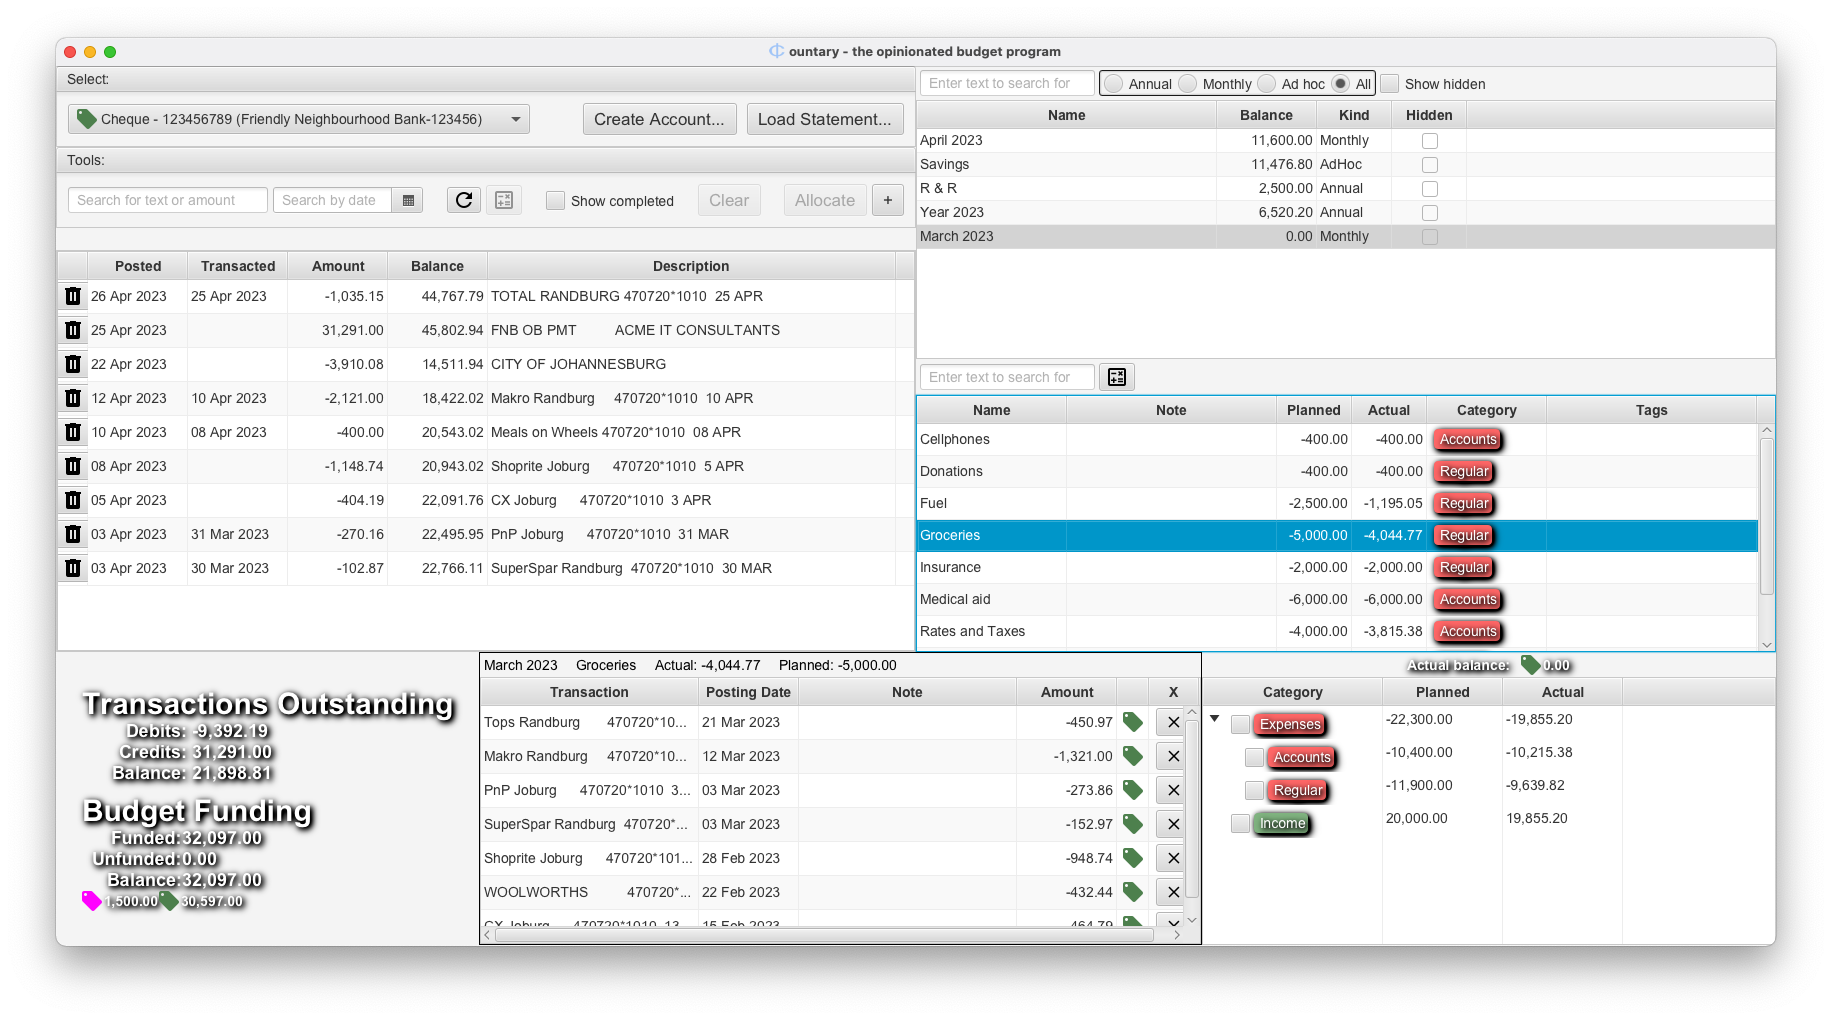 It shows that multiple transactions were allocated to the Groceries item. If you
click on the Show completed checkbox in the top left area of the window, you get
to see the transactions that have already been allocated. They are highlighted in green.
You can click on any of those to see which item they were allocated to. Here you can
see which item the DISC PREM for April 1st is allocated to (Click on the image to make it bigger):
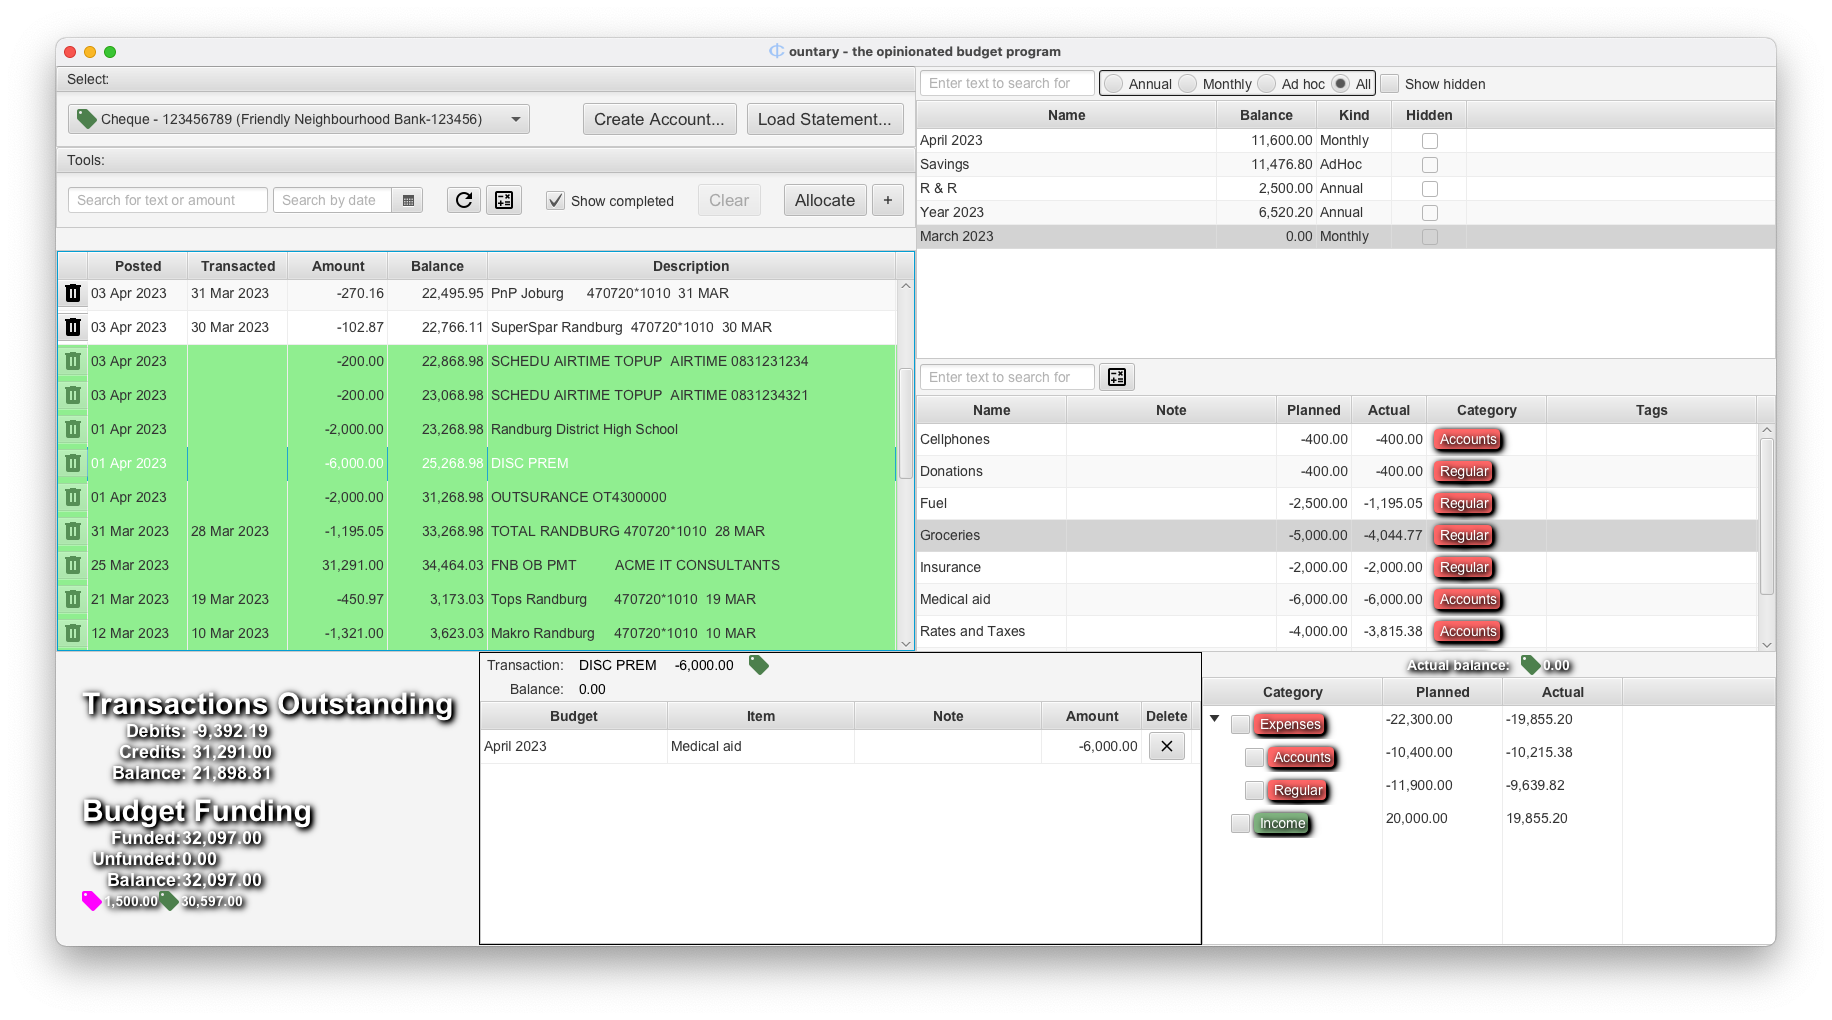
Also, recall that a transaction can be split over multiple budgets, as the salary example earlier shows.
Let us tackle an example together. Here’s a view that shows what it looks like when all
groceries transactions and the Groceries item in the April 2023 budget are selected:
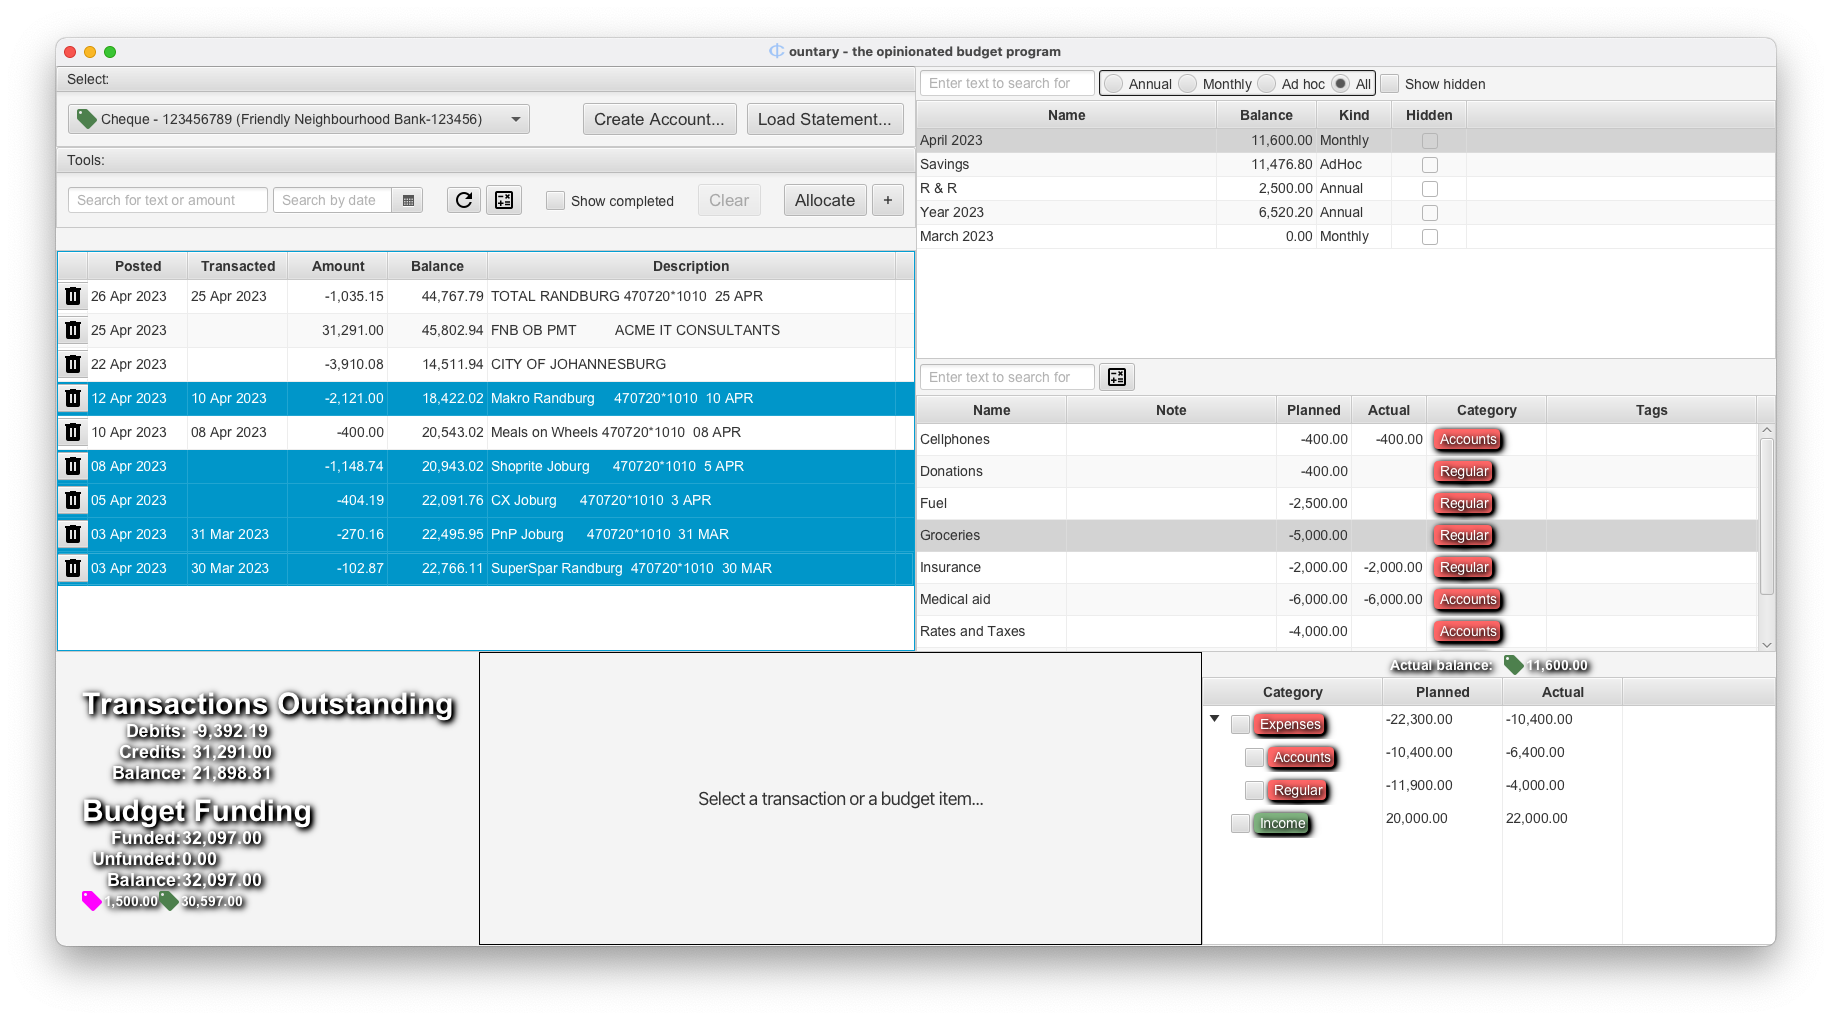 Above the transactions, find the Allocate button in the toolbar and click it:
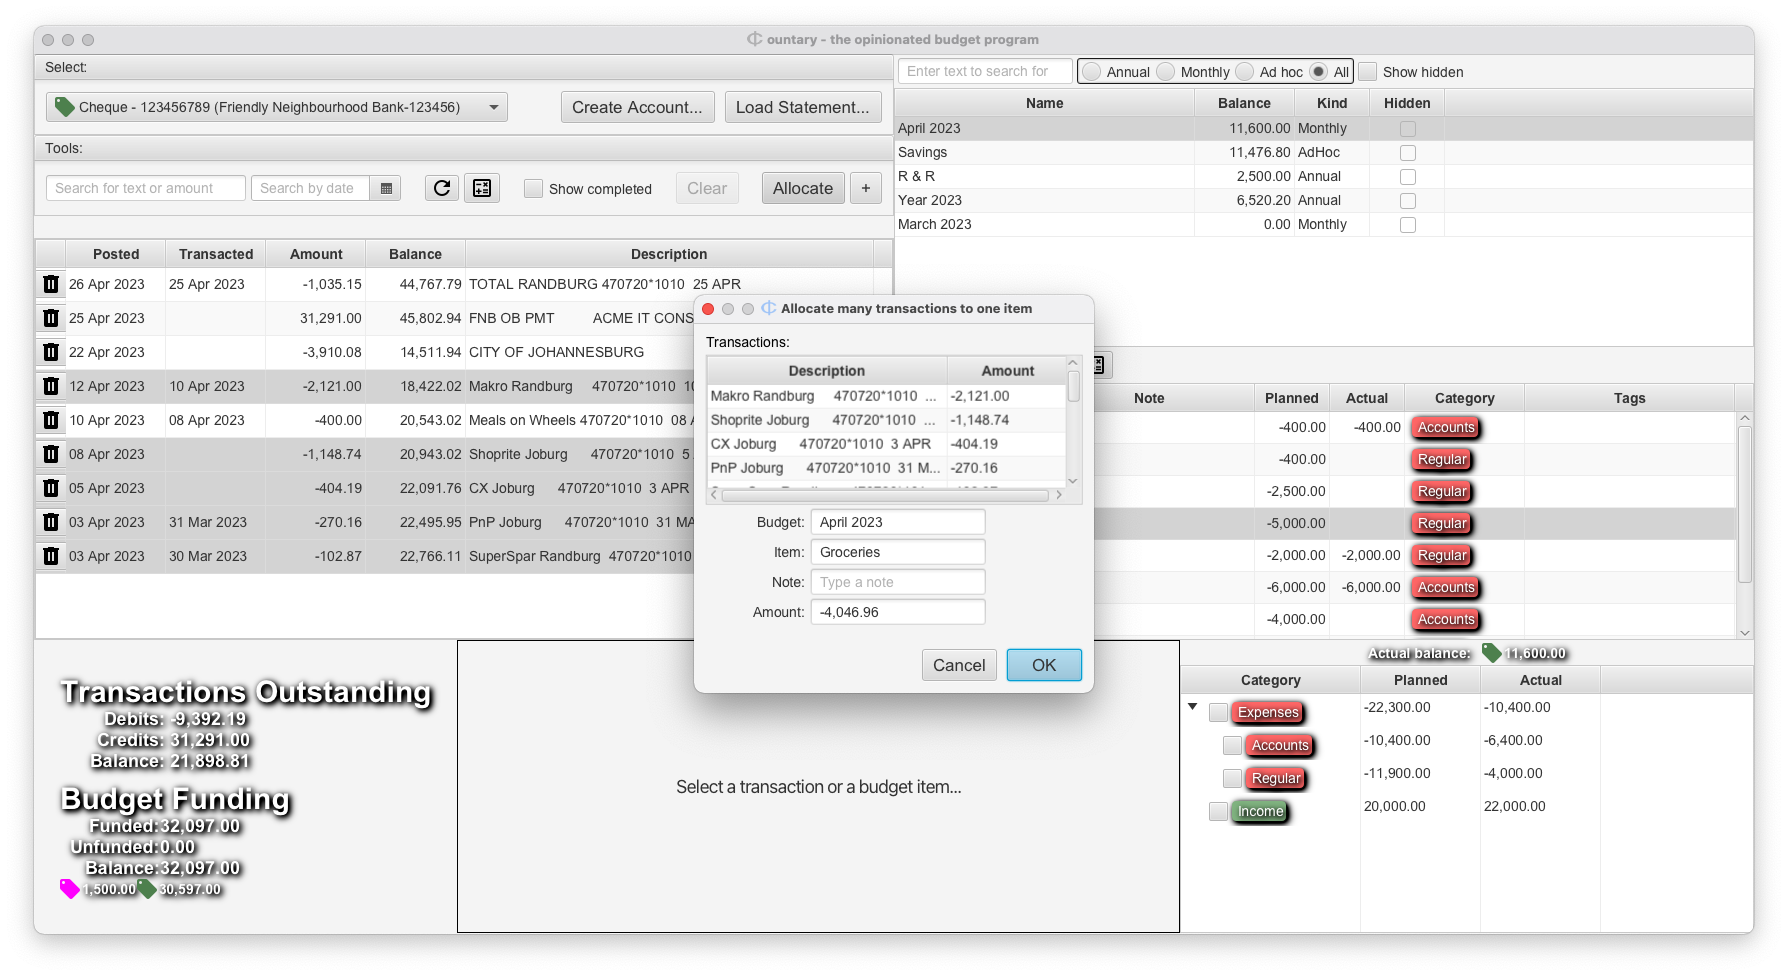 The image shows a dialog listing all the selected transactions, the budget item those
will be allocated to and the sum of the amounts of all the transactions. At this point
there is an opportunity to add a note, otherwise you can click the OK button.
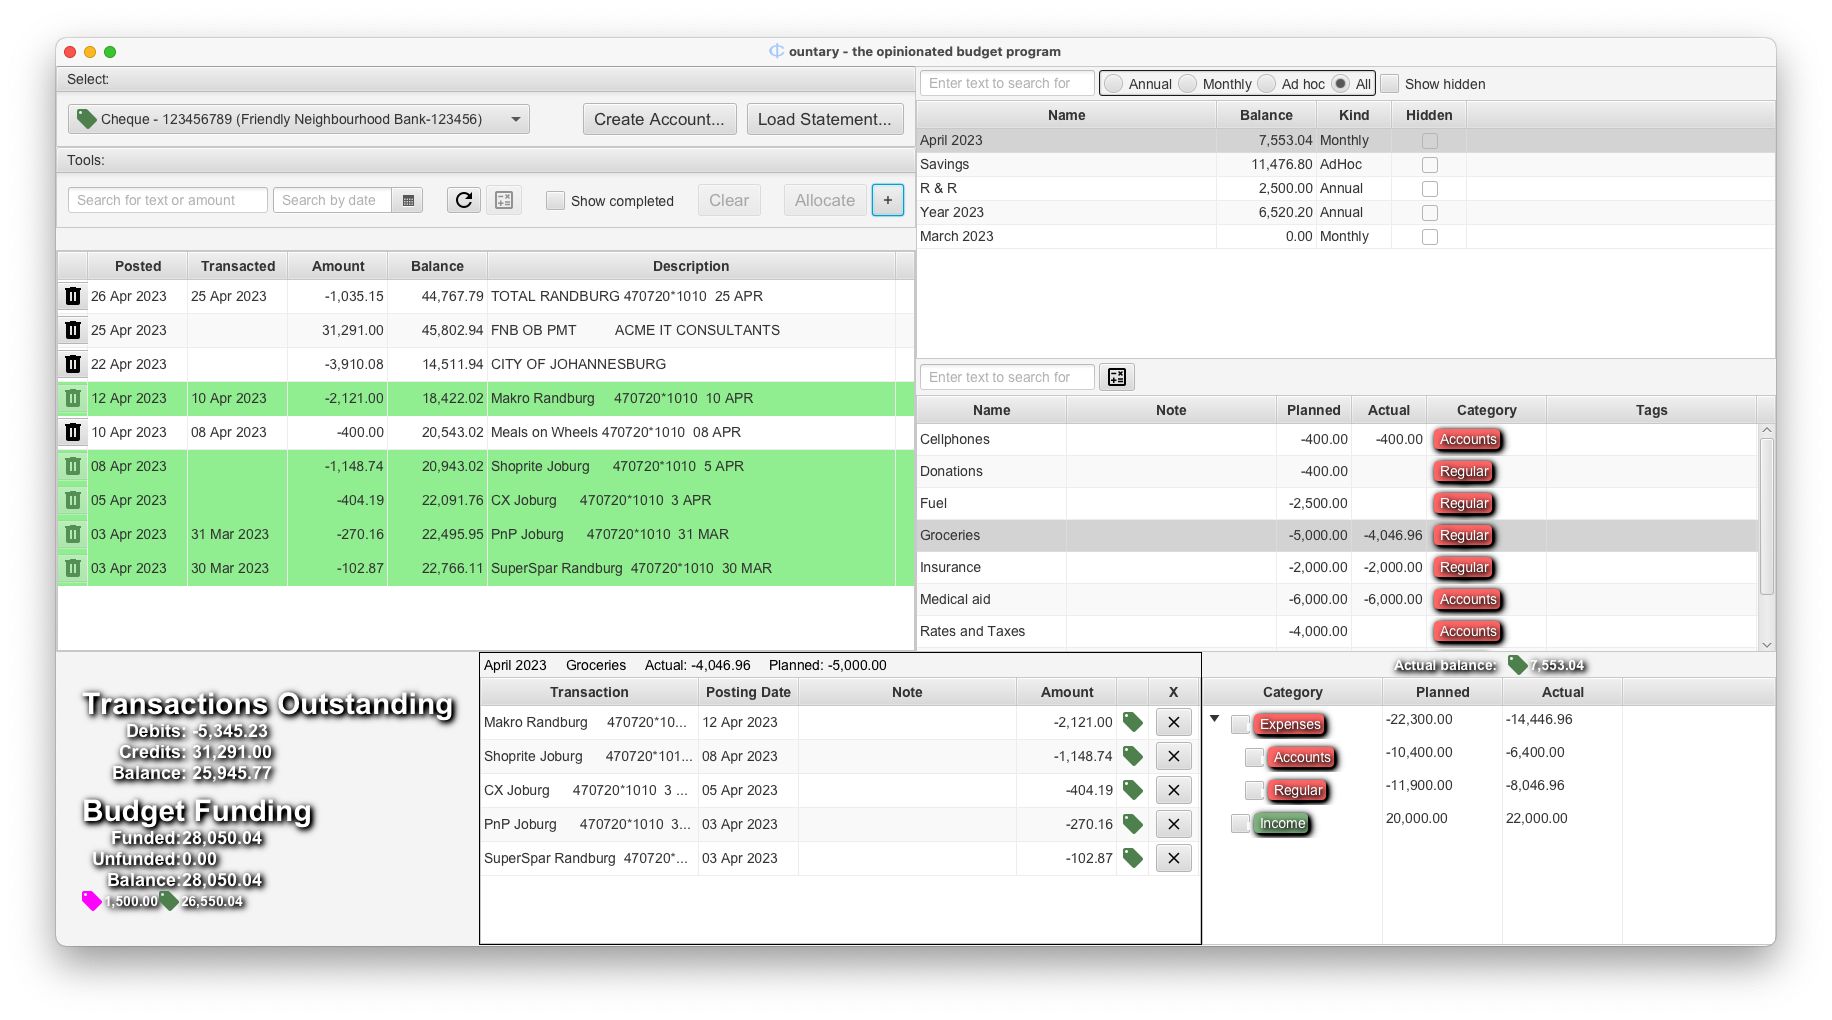
All the allocated transactions are now highlighted in green:
To reduce clutter, you can click the  button which will
will cause all allocated transactions to disappear from view:
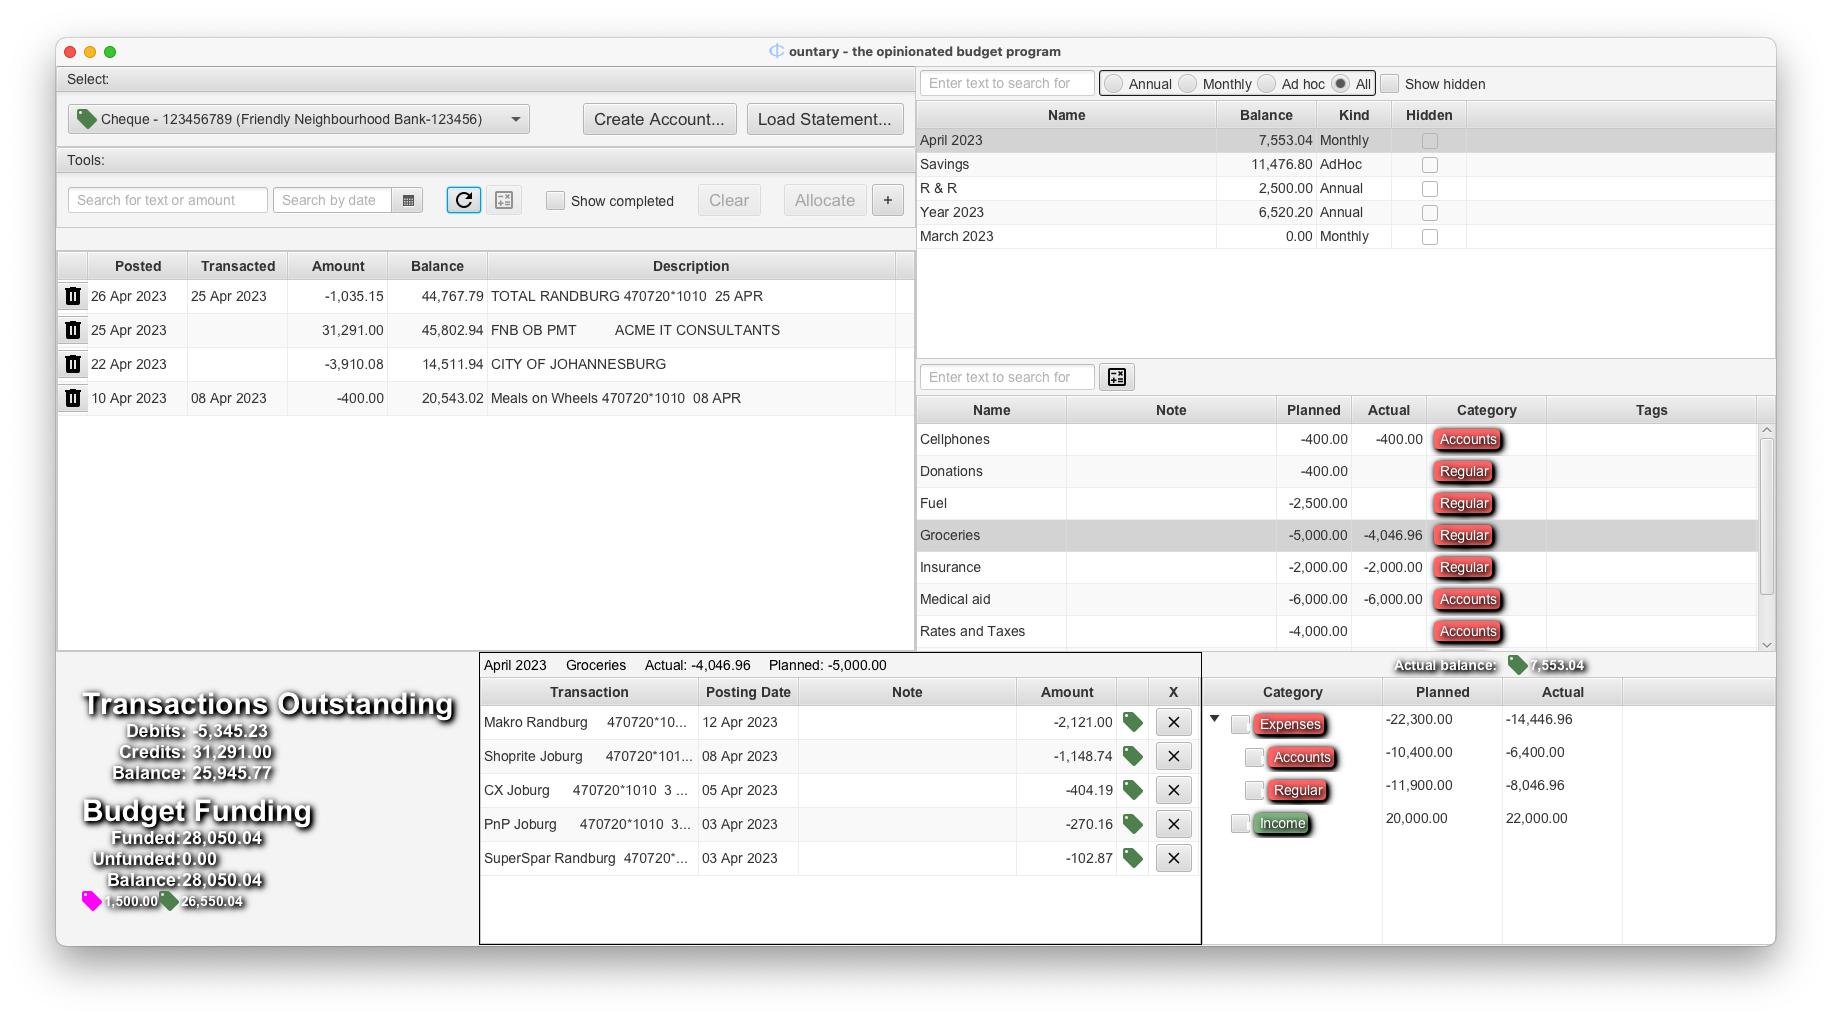
There! You should be able to allocate the rest of the transactions yourself. The TOTAL RANDBURG transaction goes to Fuel, the CITY OF… transaction to Rates and Taxes and the Meals on Wheels transaction goes to Donations.
That leaves the salary transaction: FNB OB PMT. The description likely means nothing to you. Your salary transaction, or whatever the income is that you receive, will look different, but you will recognise it. For the purposes of the demonstration, this is a salary transaction. It needs to be allocated to a number of different budgets, much like the one for the previous month. Remember you can use the Show completed check box to go back and look.
Normally salaries are paid out towards or at the end of a month. Whatever the timing, a salary usually gets allocated to the next month’s budget. As you might have noticed, there is no budget for the month of May yet. One still needs to be created.
To do that, we go to the Budgets worksheet. Click on the Show menu and select
Budget. On this budget worksheet, select the April 2023 budget:
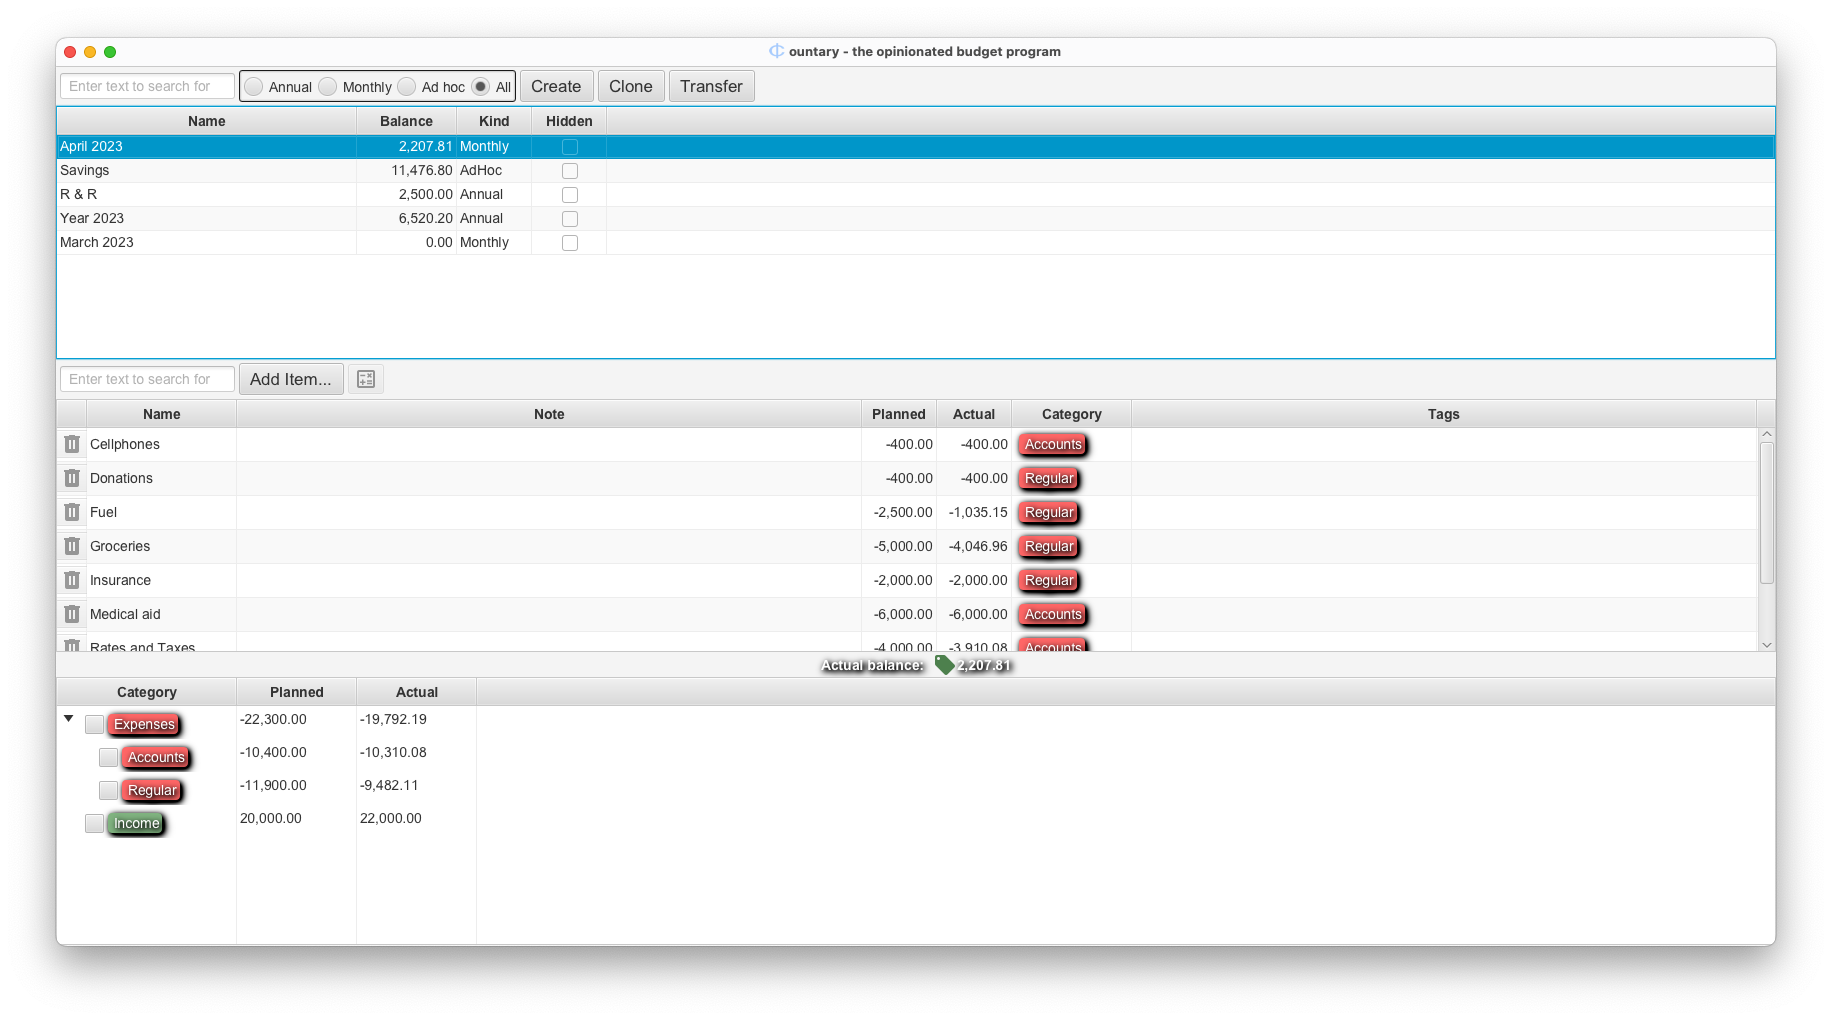 Once a budget is selected, the Clone button becomes available. Click on it:
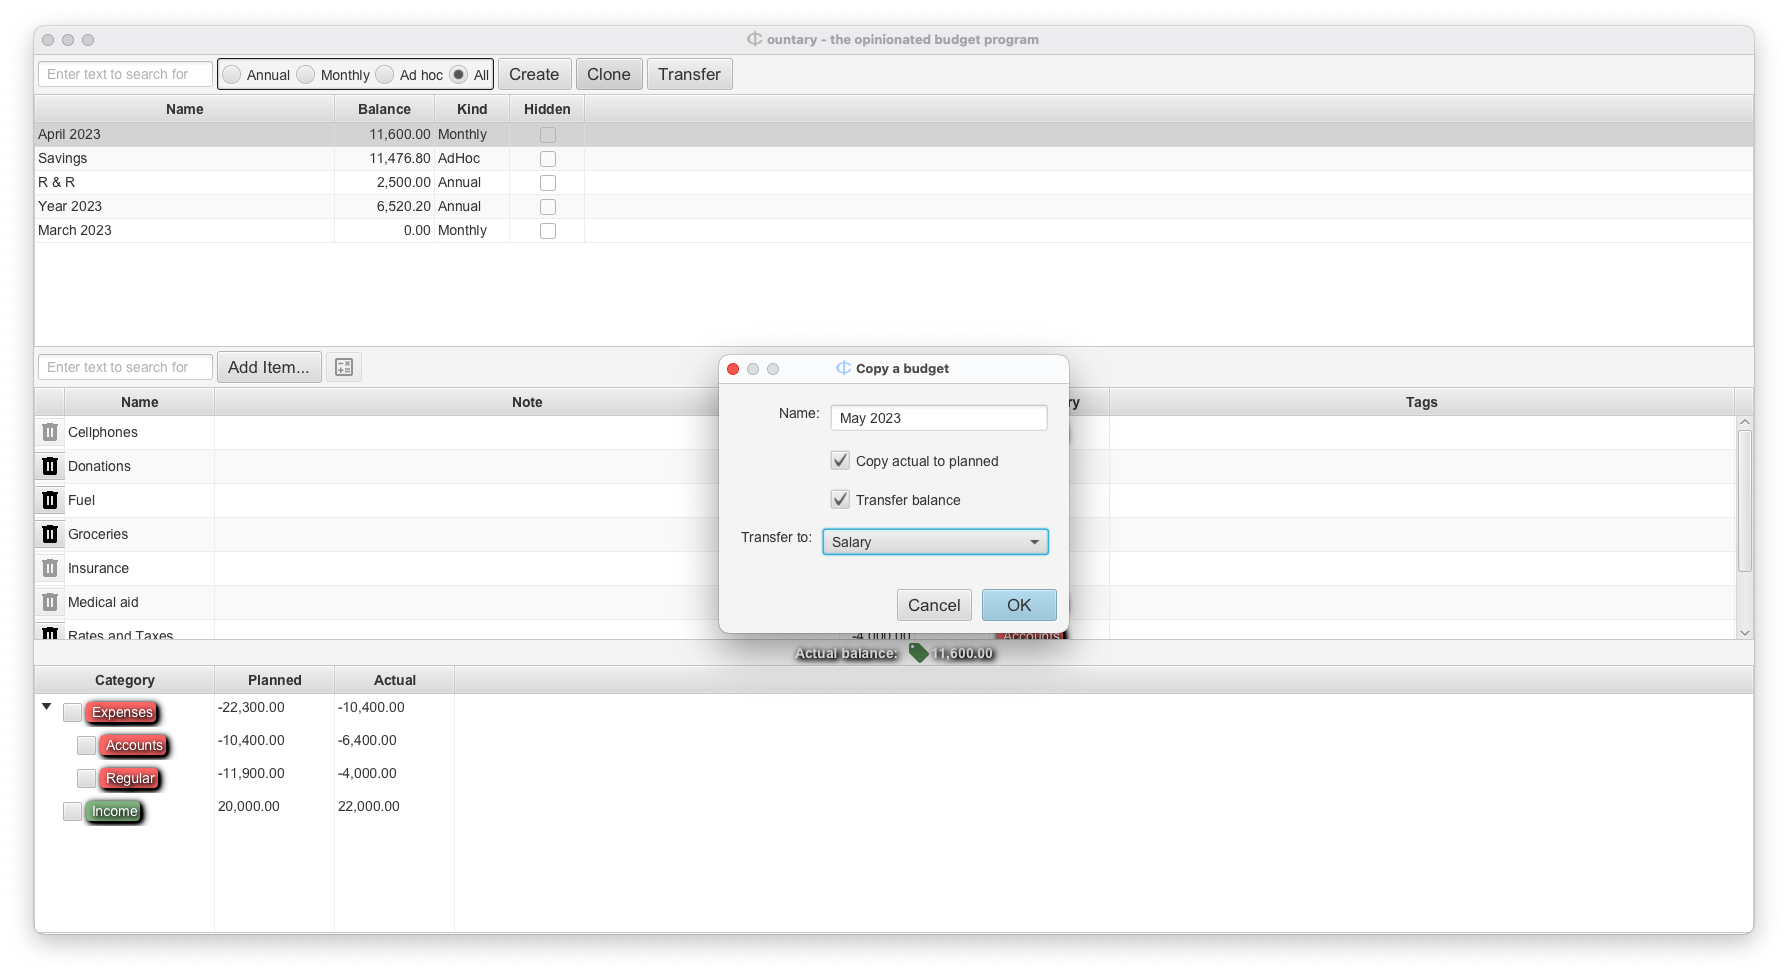 A dialog pops up and offers a number of fields:
- The Name field. Use that to name the new budget May 2023.
- The Copy actual to planned checkbox. Select it to copy all the actual values from the cloned (April 2023) budget to the new one.
- The Transfer balance checkbox. Select it to transfer the balance of the cloned budget to the clone. This will cause the cloned budget to end on a zero balance and the new budget will have what was left - whether it be a surplus or a deficit.
- If you did select the Transfer Balance checkbox, then the Transfer To drop-down list needs to be used to decide which budget item is to receive the balance transaction.
When you are ready, click the OK button. All the items from the April 2023 are copied to the new budget and the budget gets added to the list in the topmost table. The balance maybe be adjusted and the planned values of the clone may be updated depending on the choices you made. You can now add items to the new budget or remove items no longer relevant.
Now that we have a budget for May 2023, we can go back to the Transactions worksheet.
Click the Show menu and select Transactions. We can go ahead and allocate
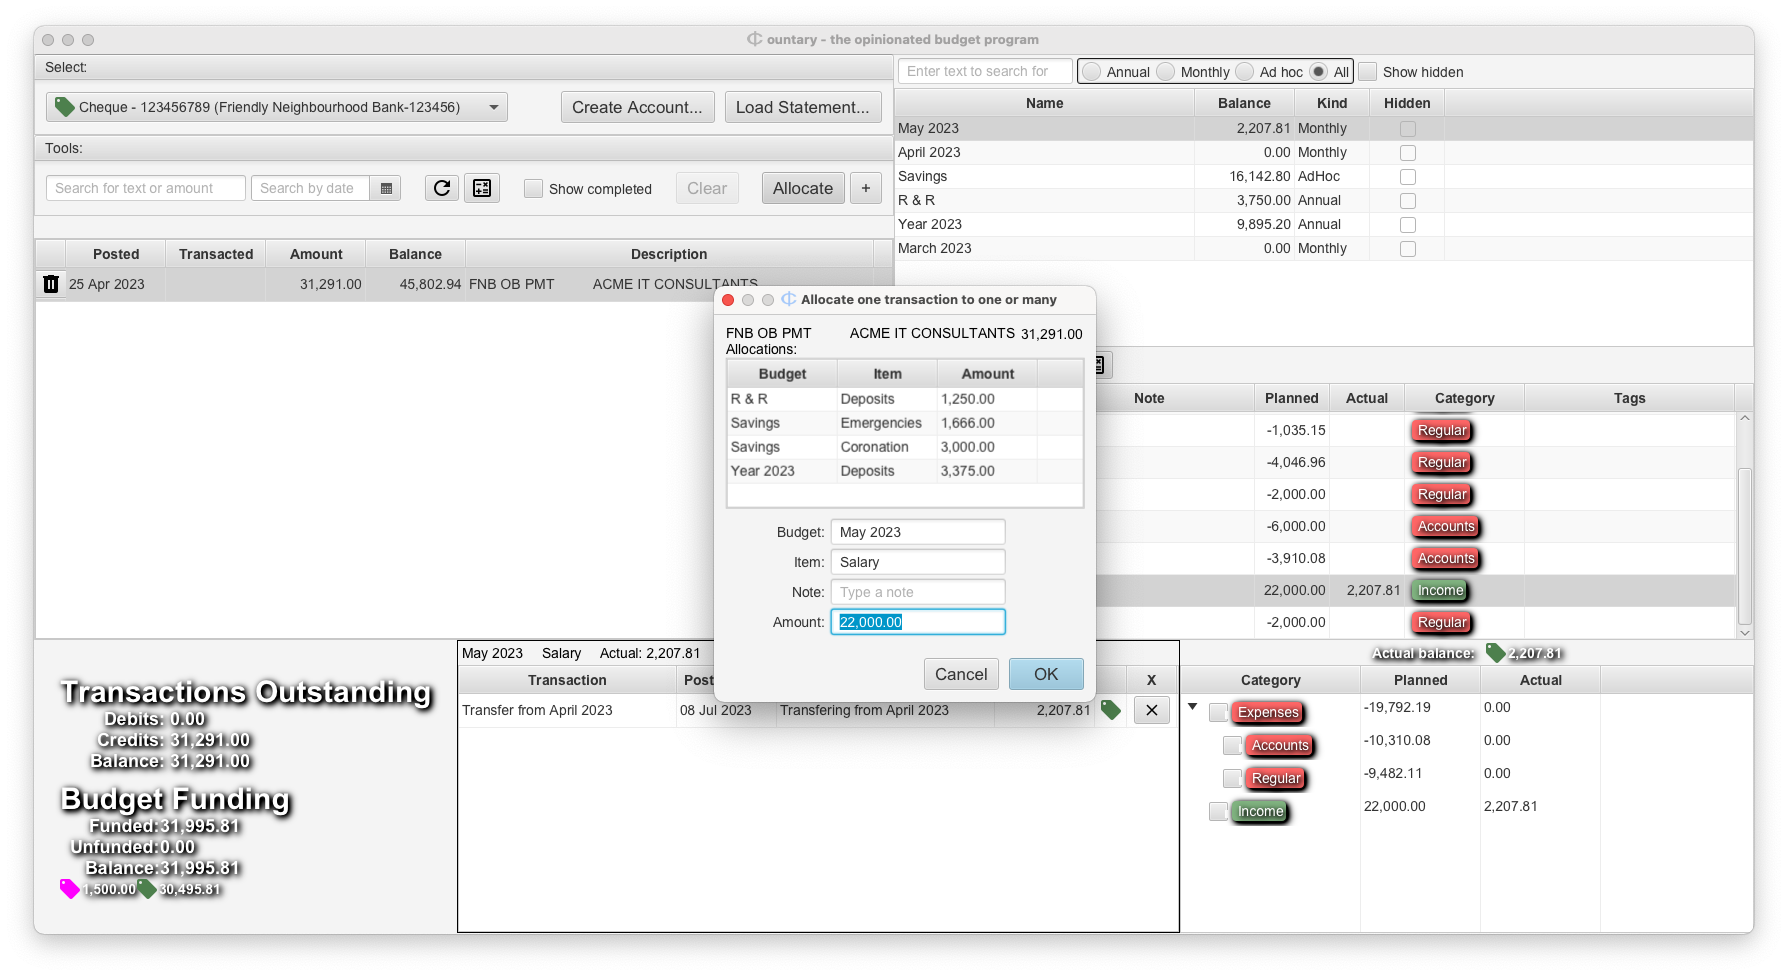
the salary to the different budgets that was decided. Following the pattern that was
established for the previous salary deposits, this is what things look like after allocating
to the R & R, Savings and Year 2023 budgets. Clicking OK will assign the balance
of the salary to the May 2023 budget::
 Clicking on OK gets us to:
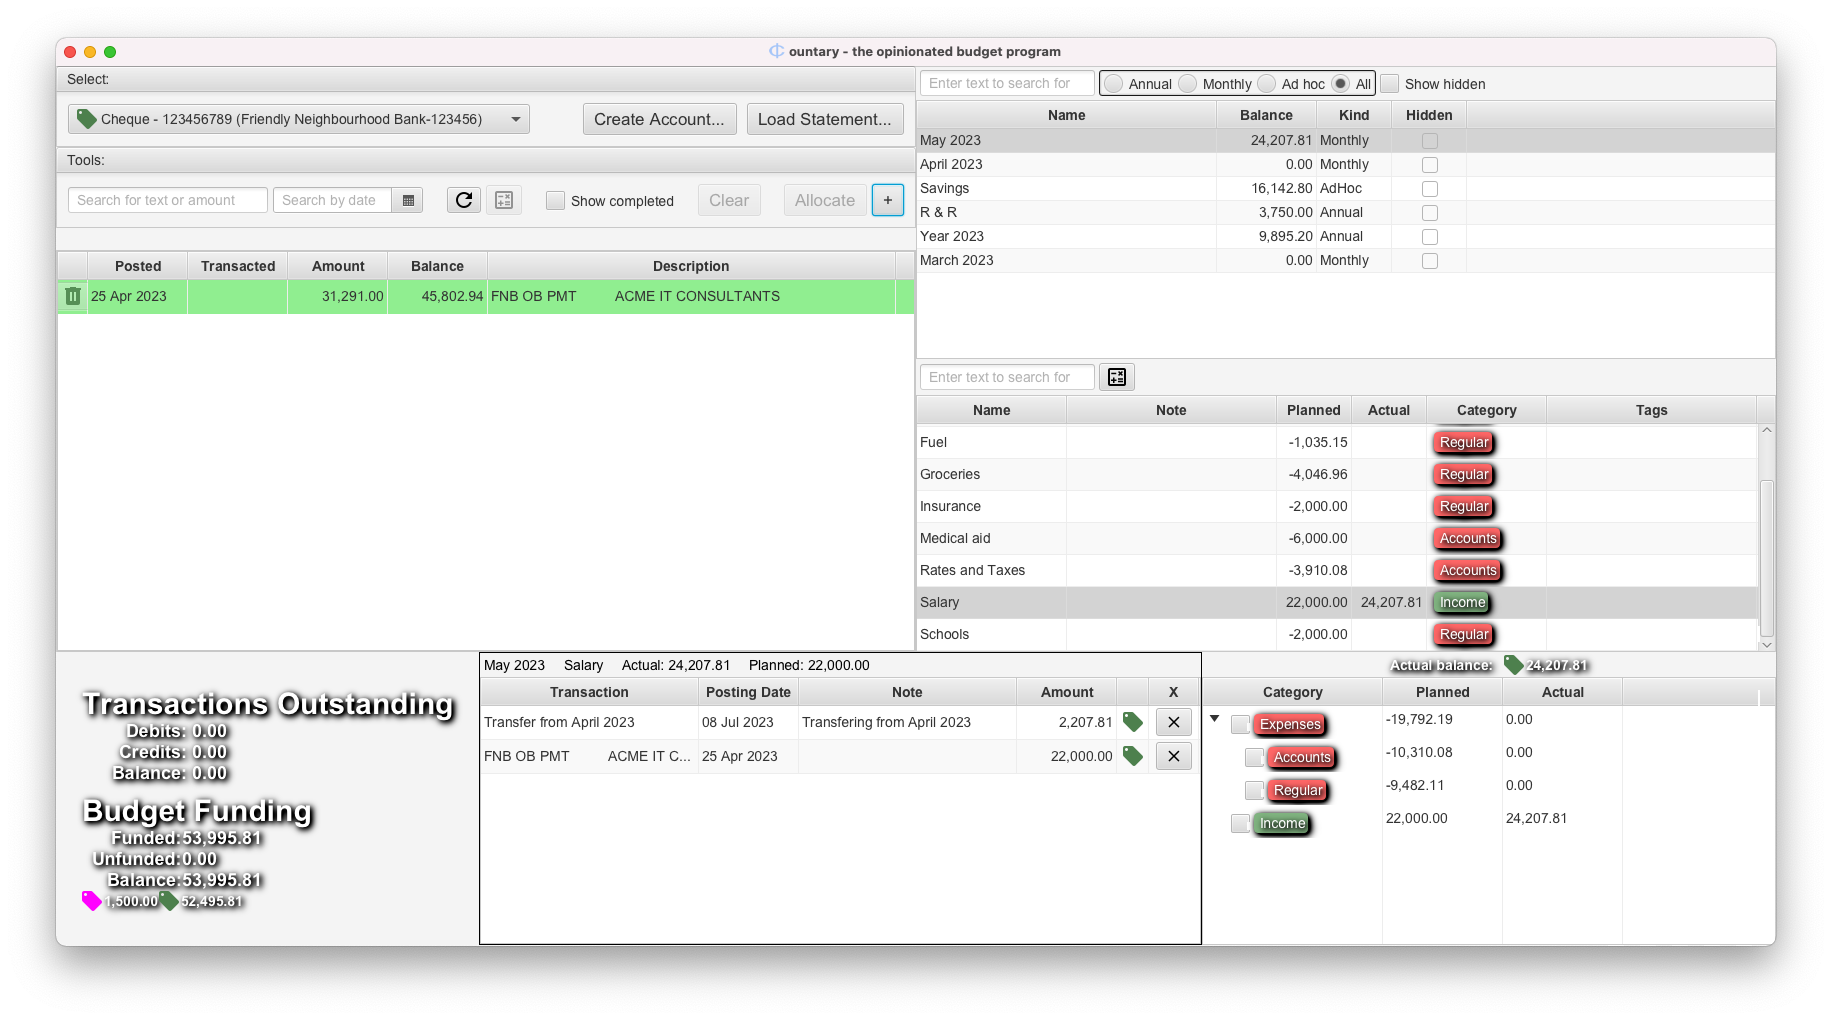
However, we are not done yet. Allocating all transactions is not our only objective. We have another objective: to close off budgets when they are no longer needed. This is what we need to aim for with all our budgets. When we take a look at March 2023, we notice that it has a balance of 0.00. For some Ad Hoc budgets this may take years, but for monthly budgets, this should not take much longer than a month. Recall that when we cloned the March 2023 budget we chose to transfer its positive balance to the new budget. That is one way of handling it. Another way would be to change the allocations that we made. Let’s assume we did not transfer the balance when we cloned March 2023.
According to our Demo database, we achieved a positive balance of 2,207.81, which means we
have money left over which we should allocate somewhere else. Let us say we decide to
fatten our emergency fund with this excess. What we need to do now is to change our previous
salary allocation. First we select the Salary item on the April 2023 budget and
then we click on the X encircled in red as follows:
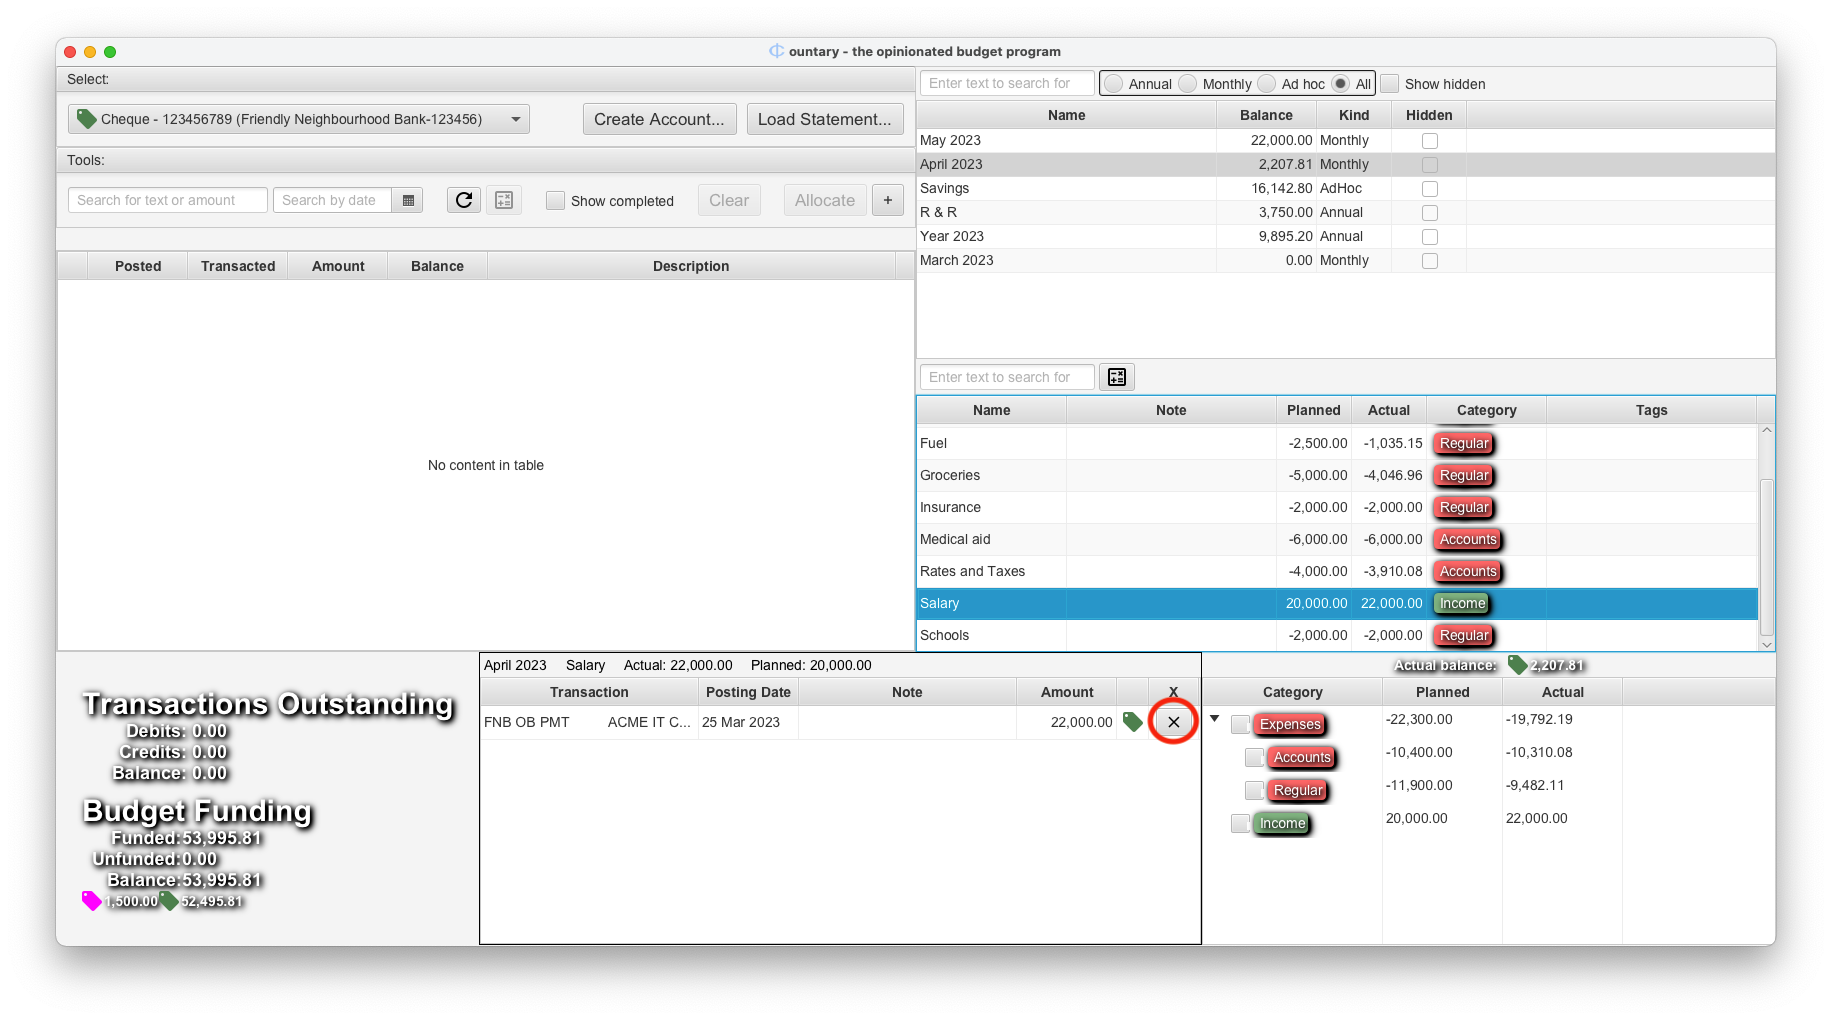 That will remove the allocation and the transaction will again appear in the worksheet:
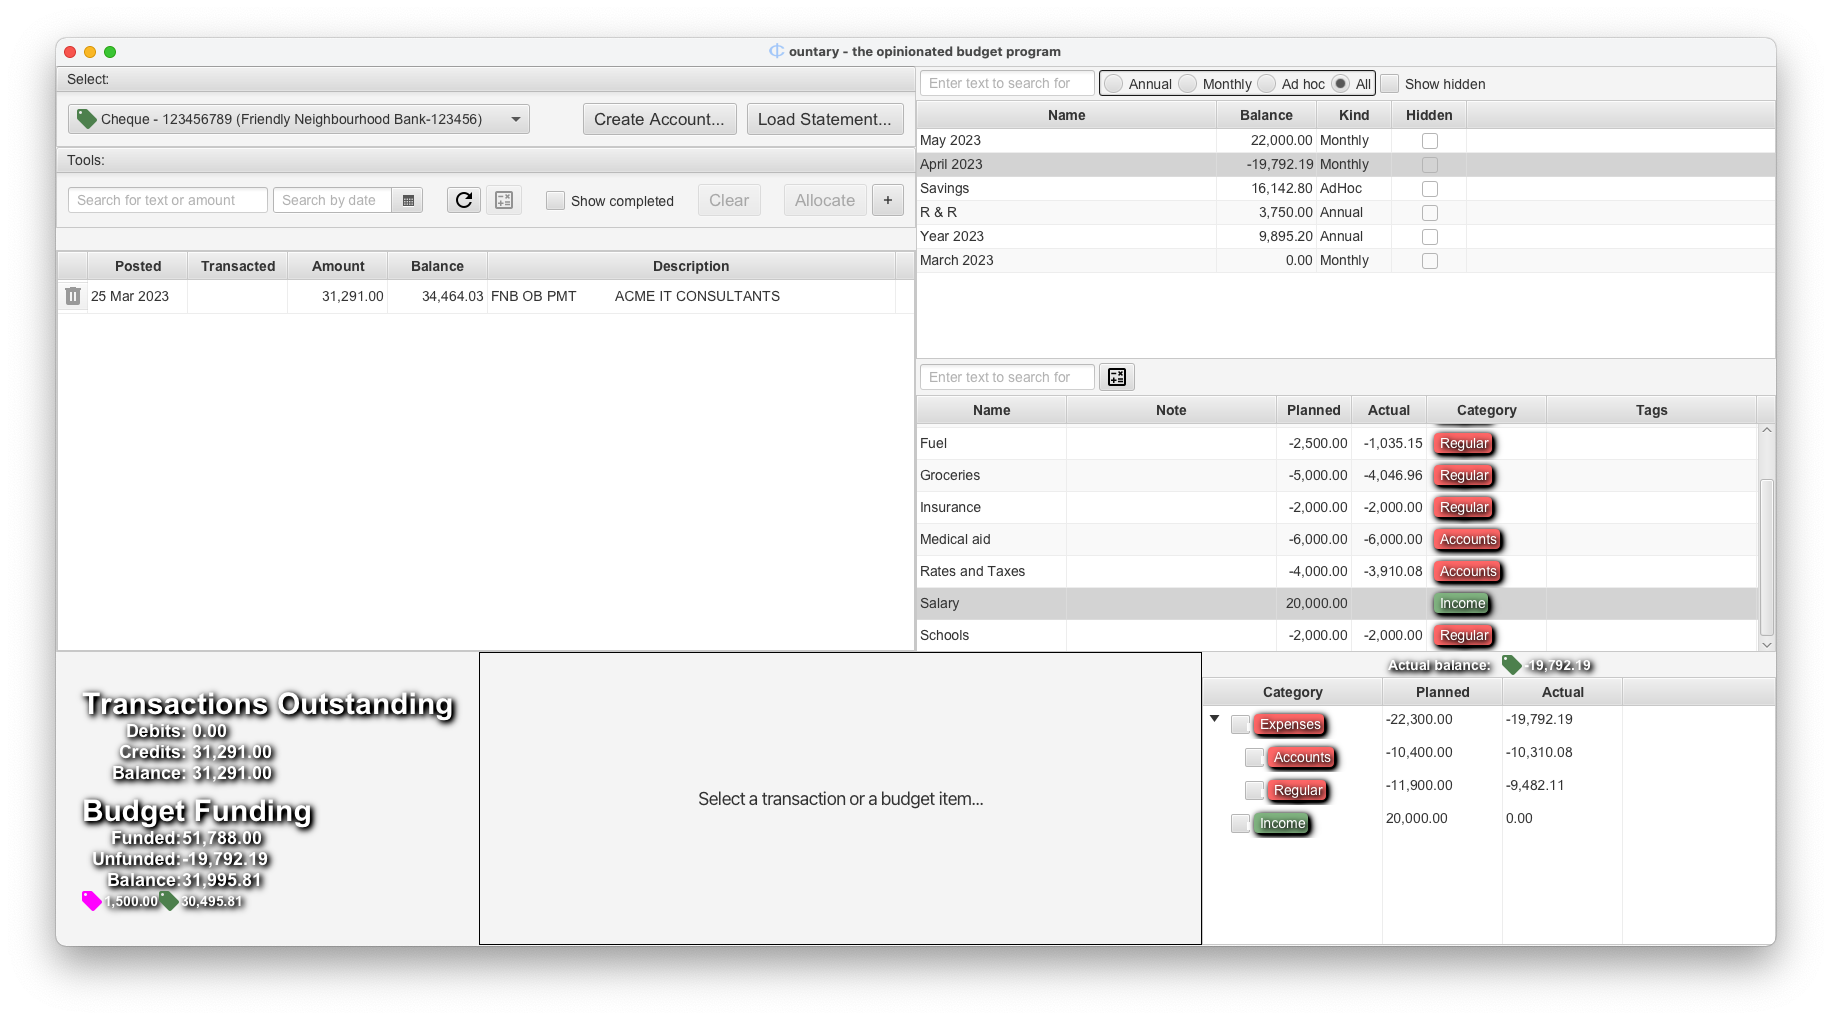 Now we allocate the exact amount needed to bring the balance for April 2023 to zero:
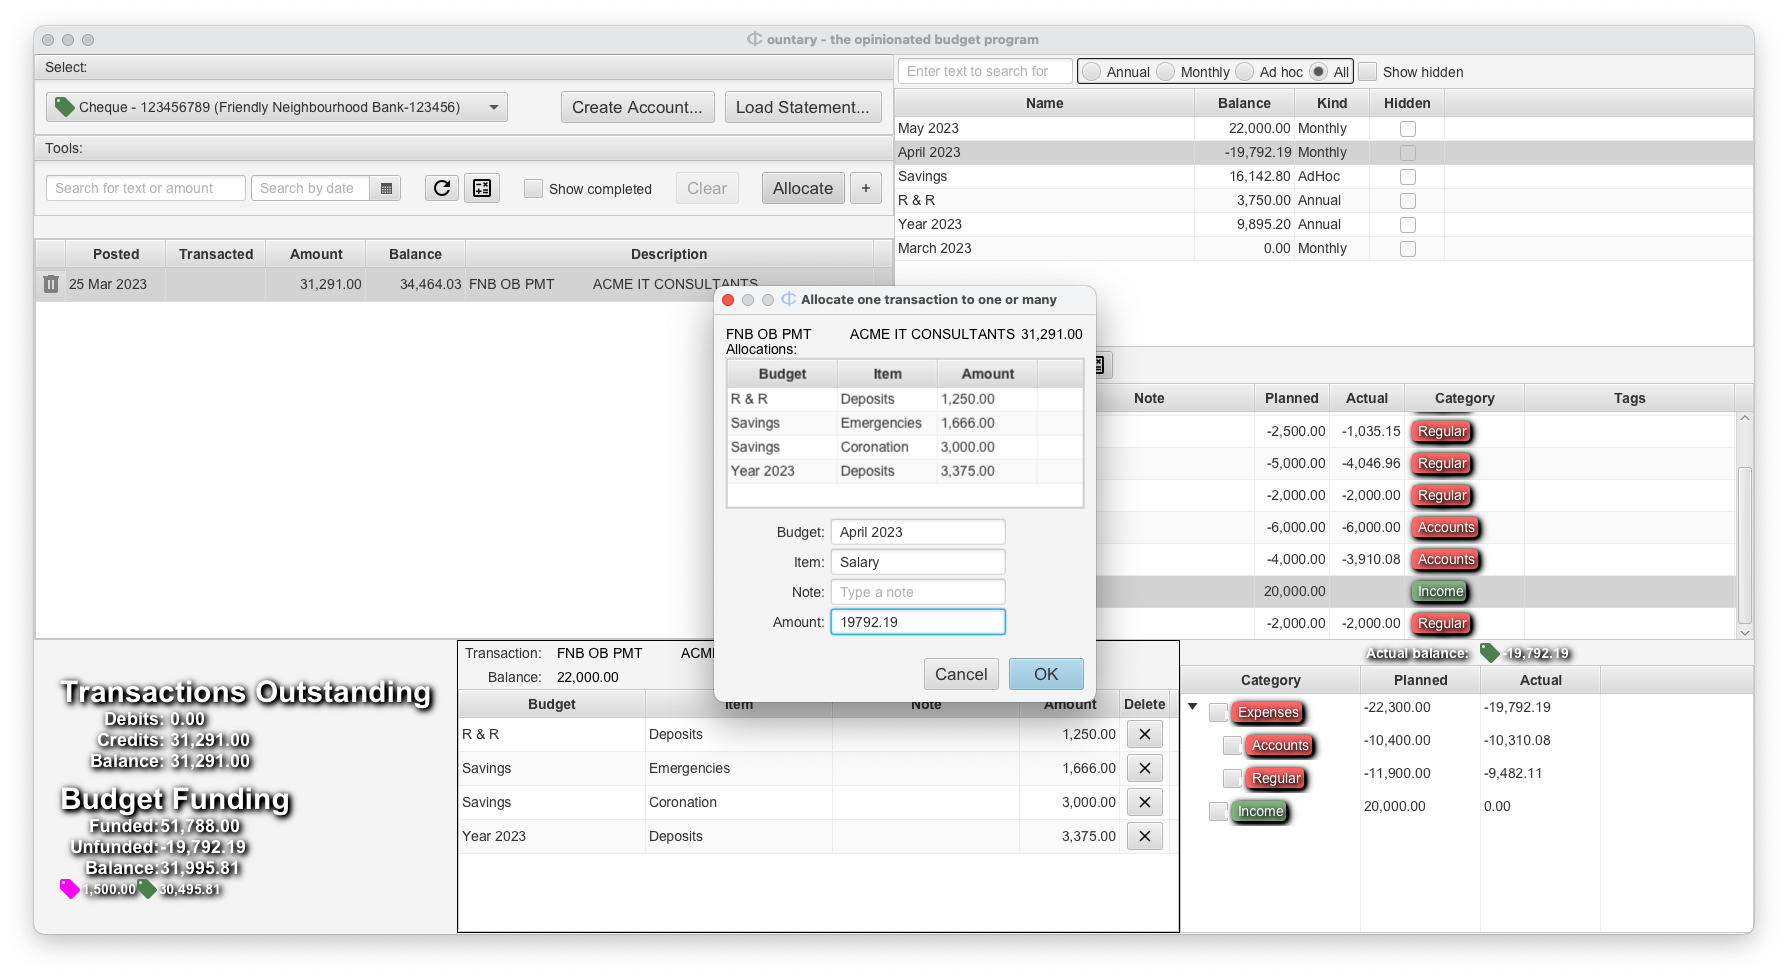 and click OK.
Next we need to remove our previous allocation to the emergency fund bly clicking on the X encircled in red:
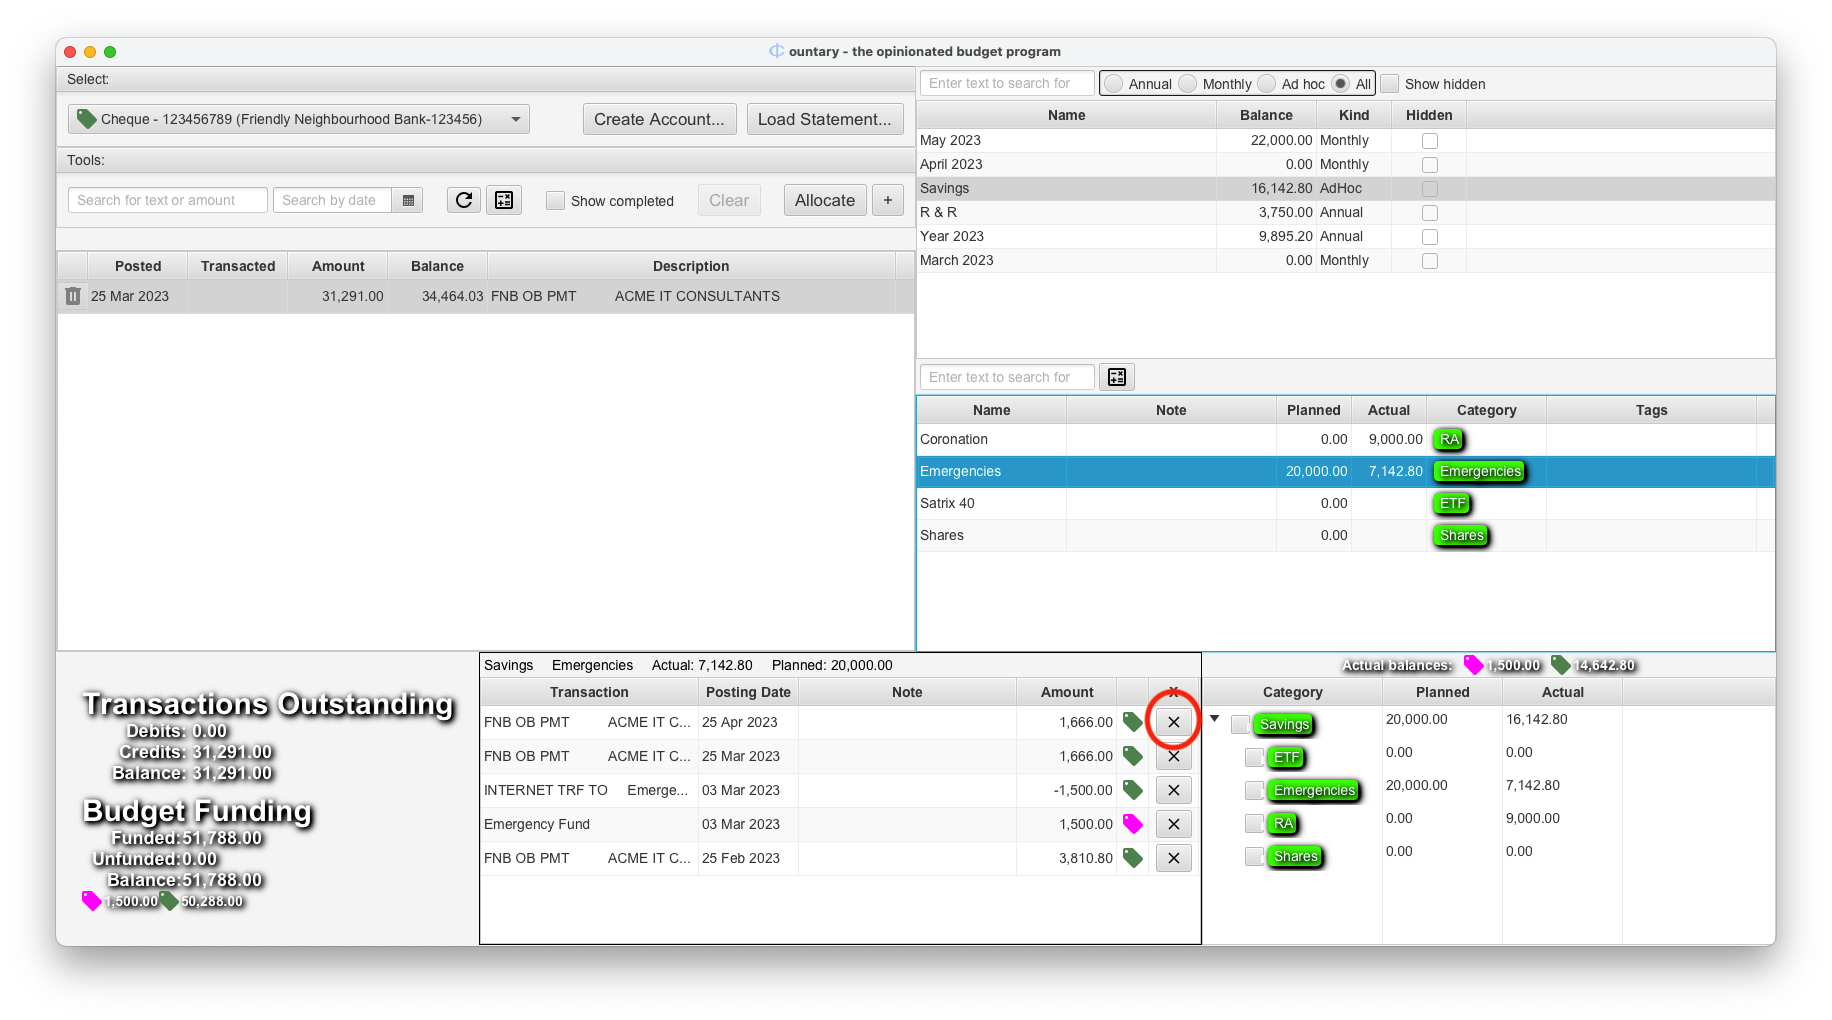 The last step now is to redo our emergency fund allocation with the balance of the salary
transaction:
 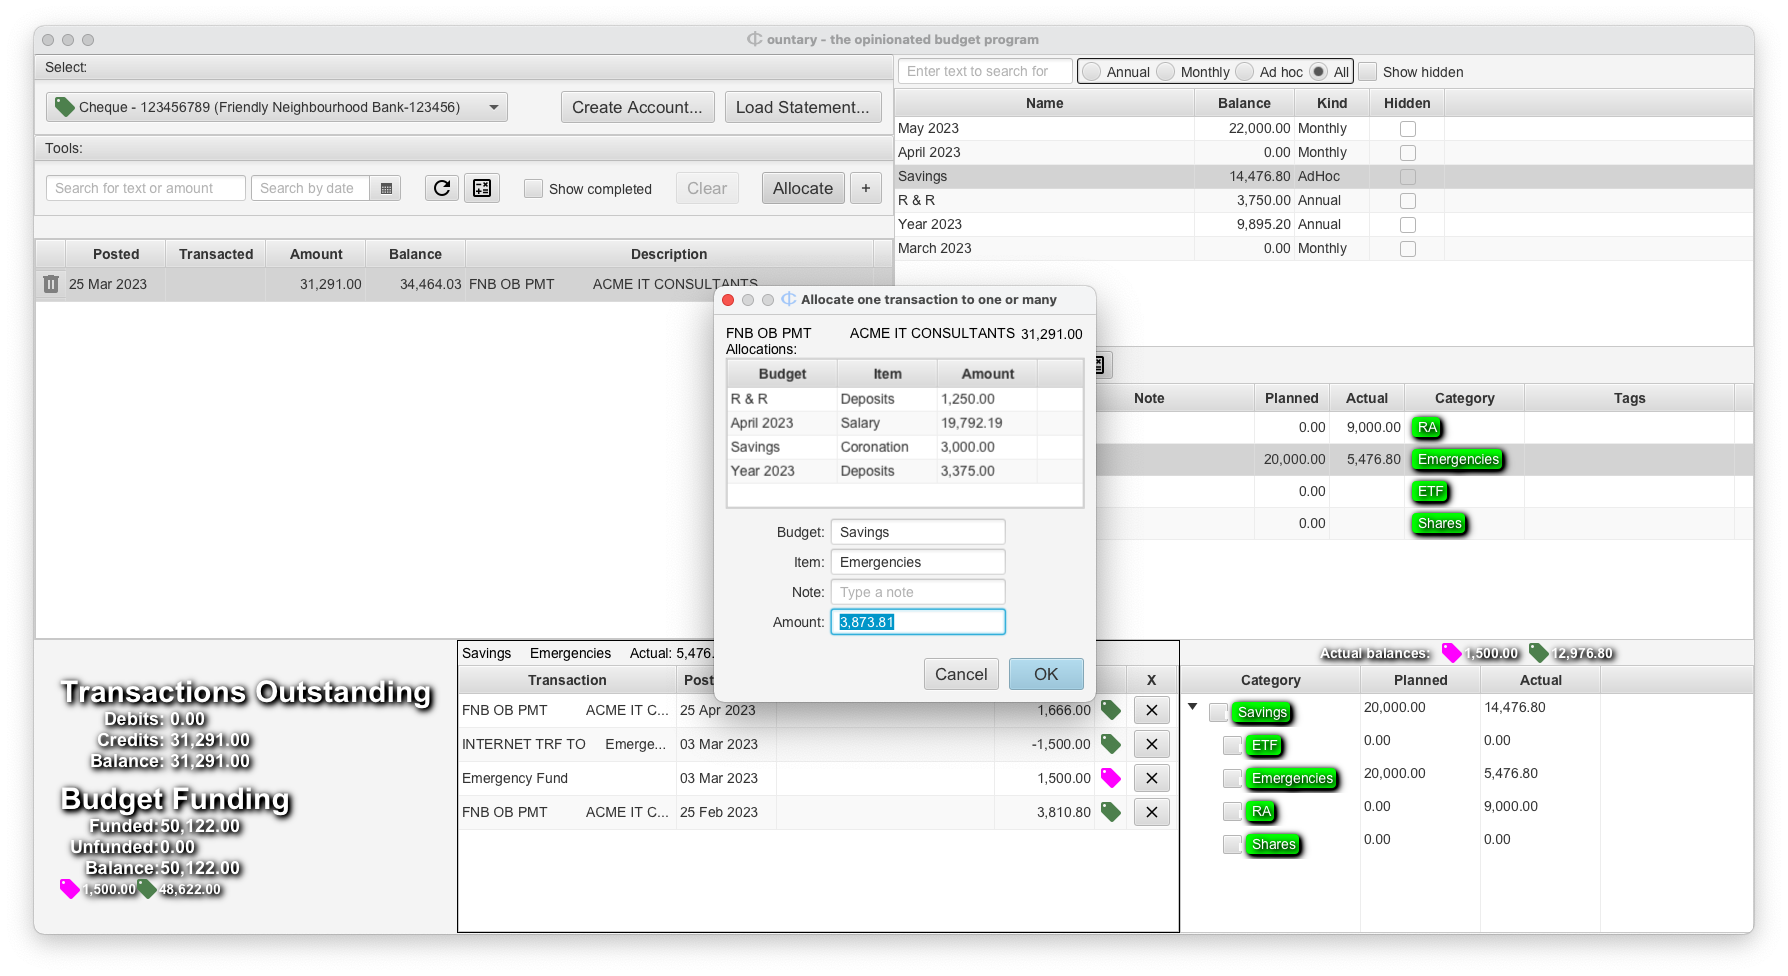 And we are done! Our worksheet is clean:
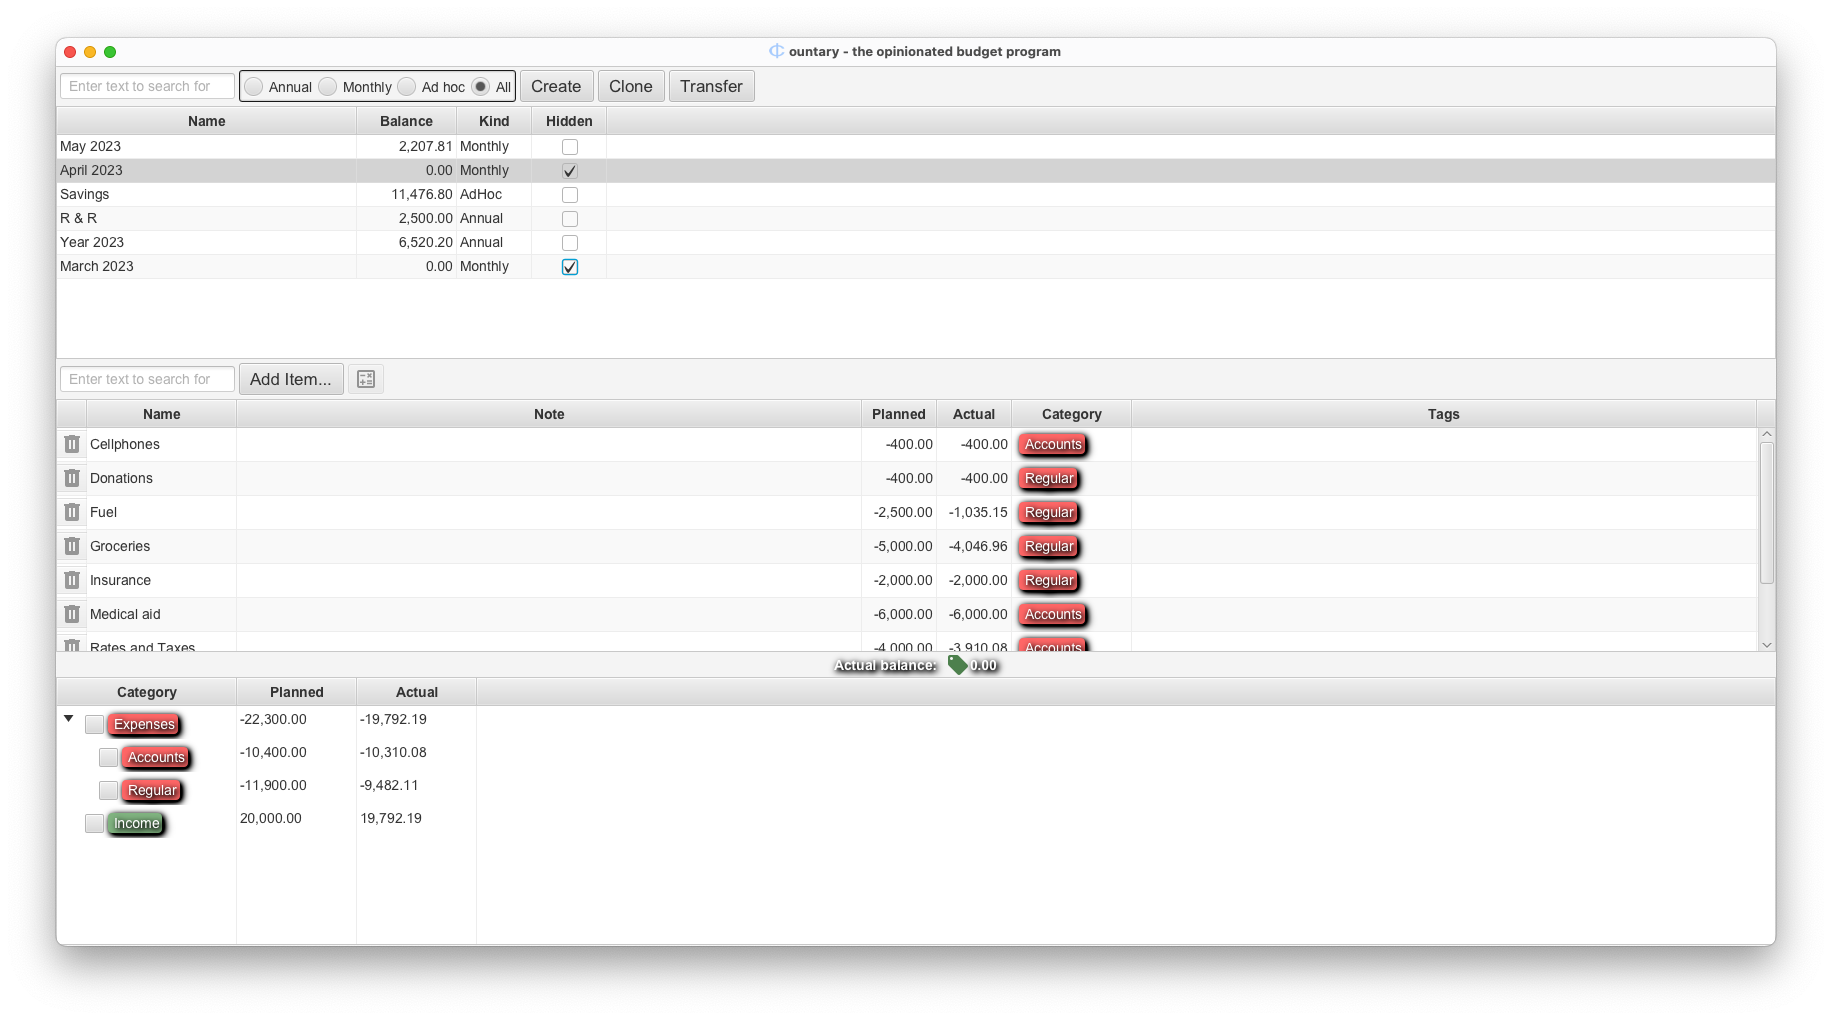
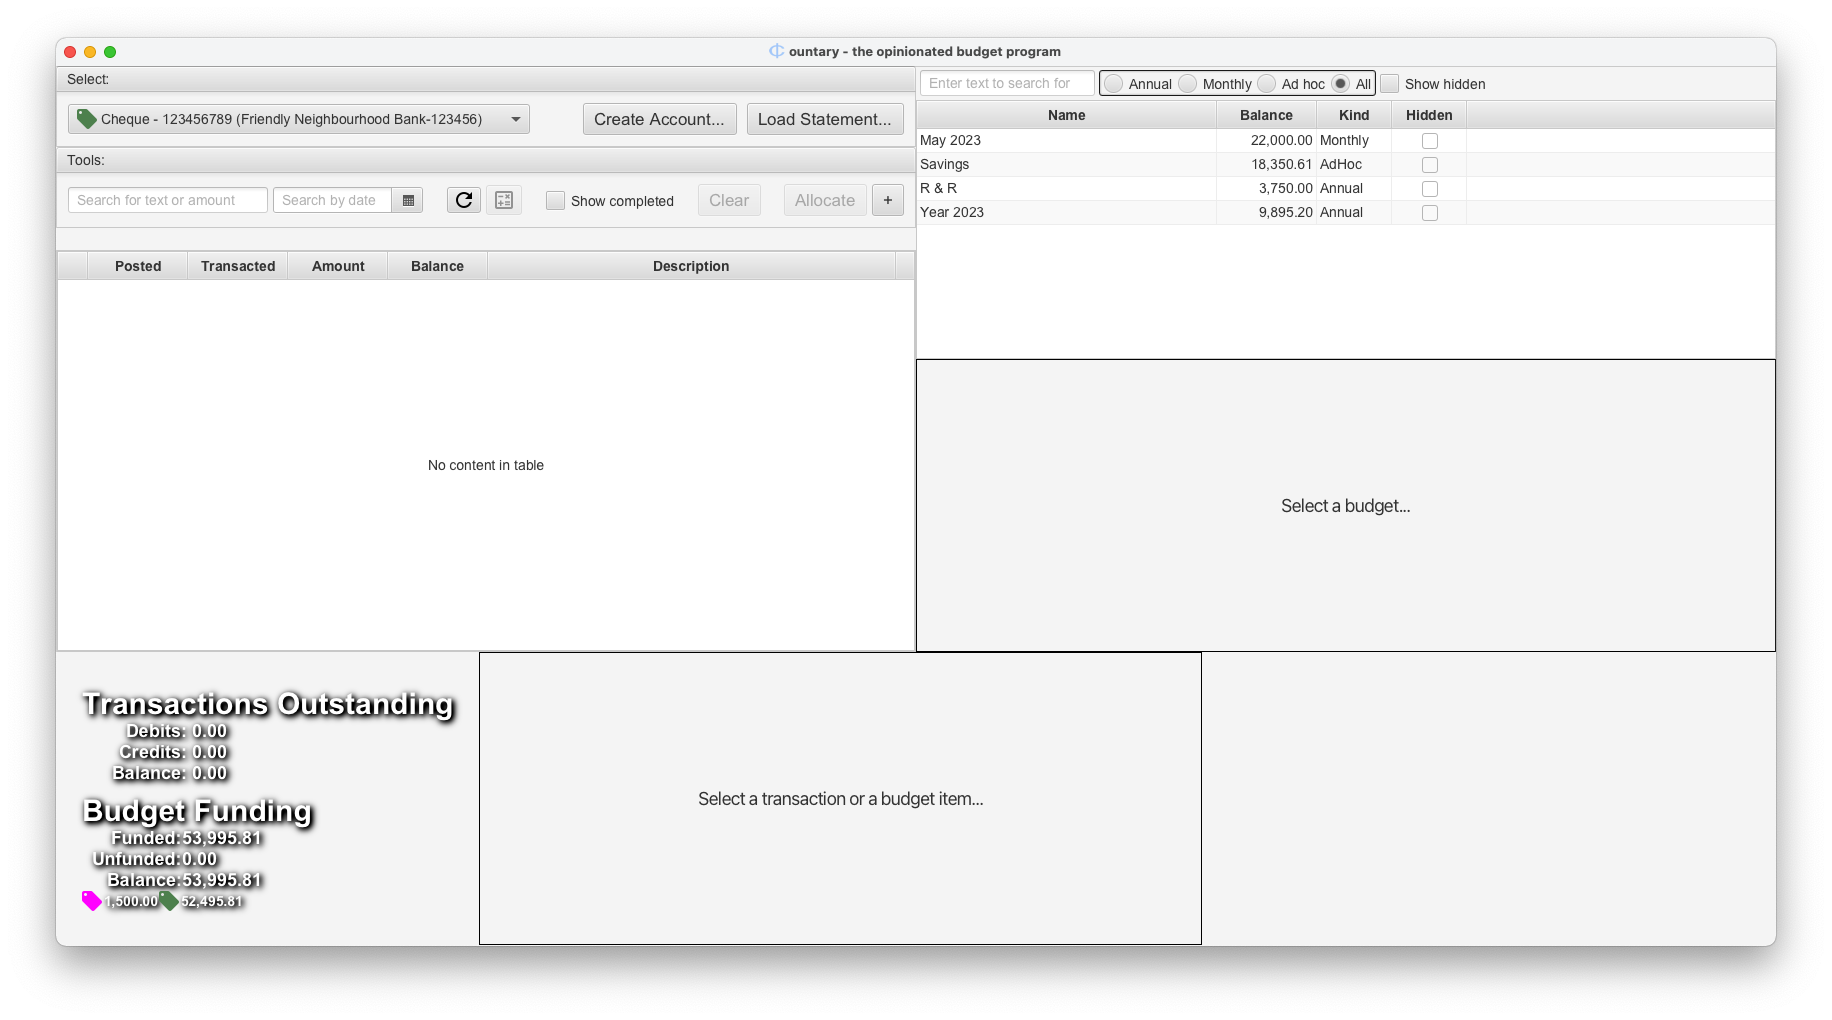
 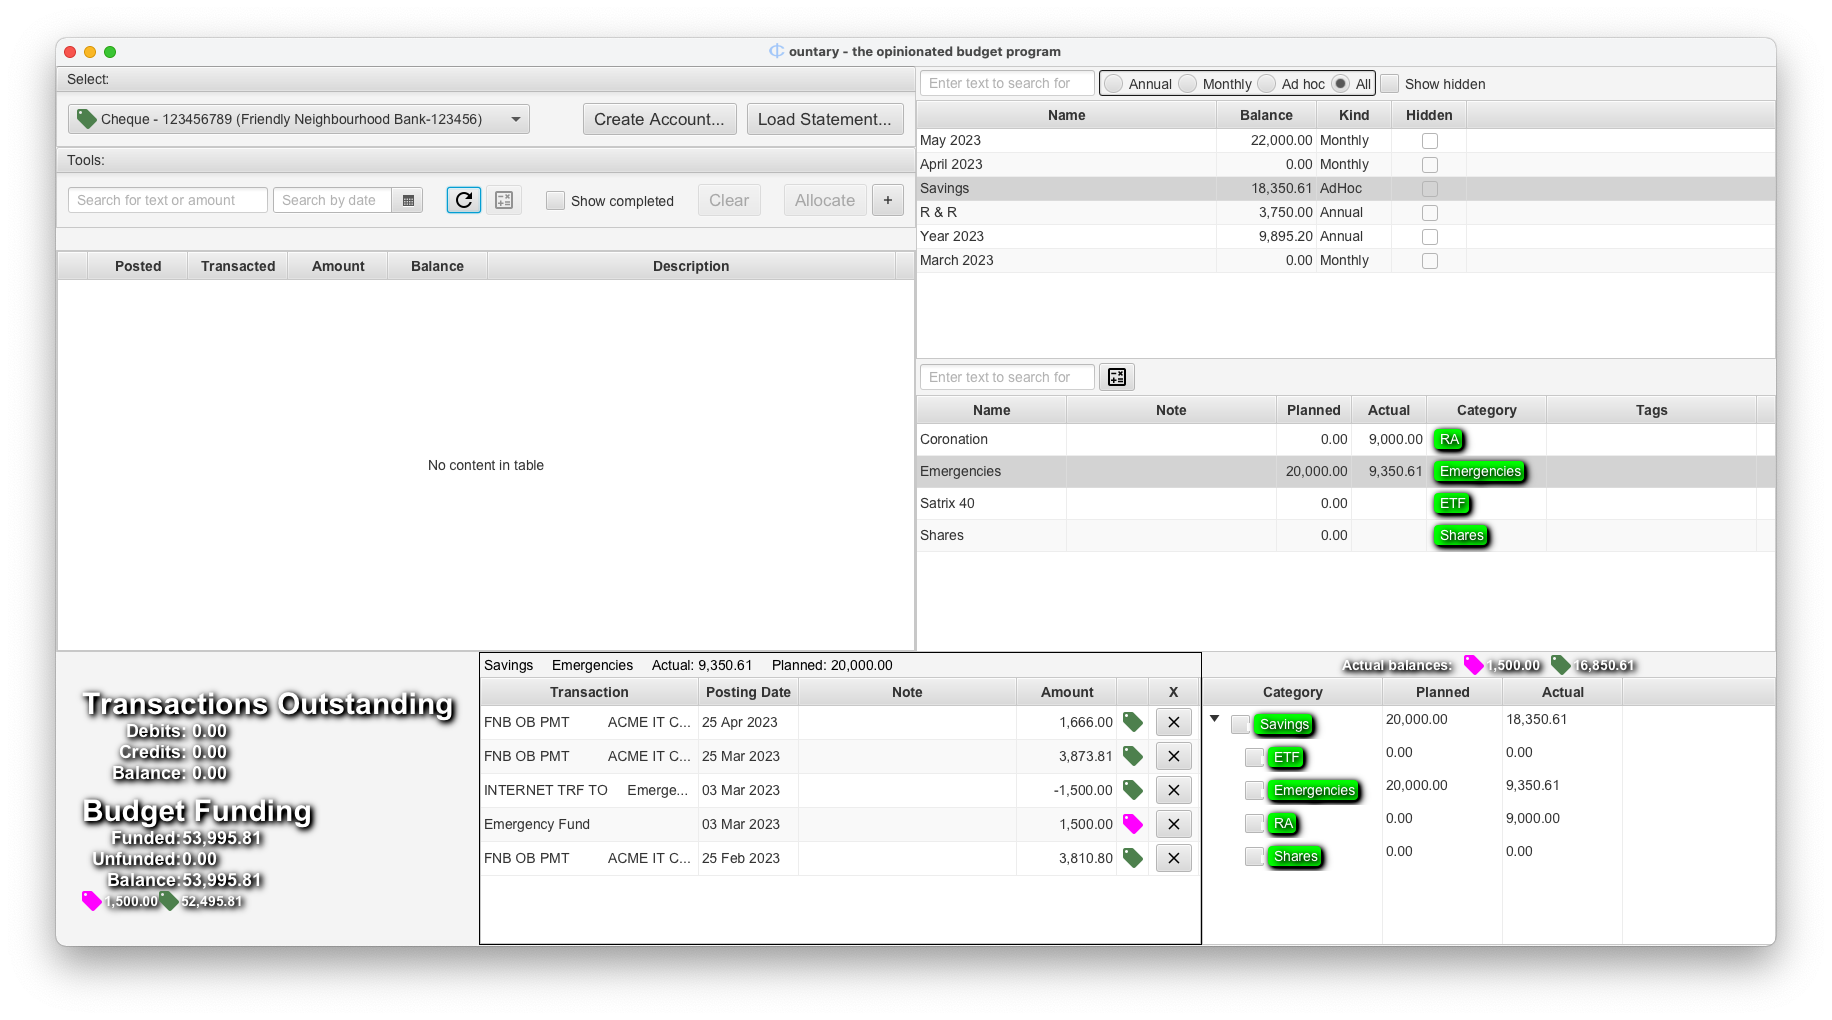 To further reduce clutter we can now go to the Budget worksheet and select the Hidden
checkboxes which will cause the budgets to disappear from view on the Transactions worksheet:
Budget Transfers
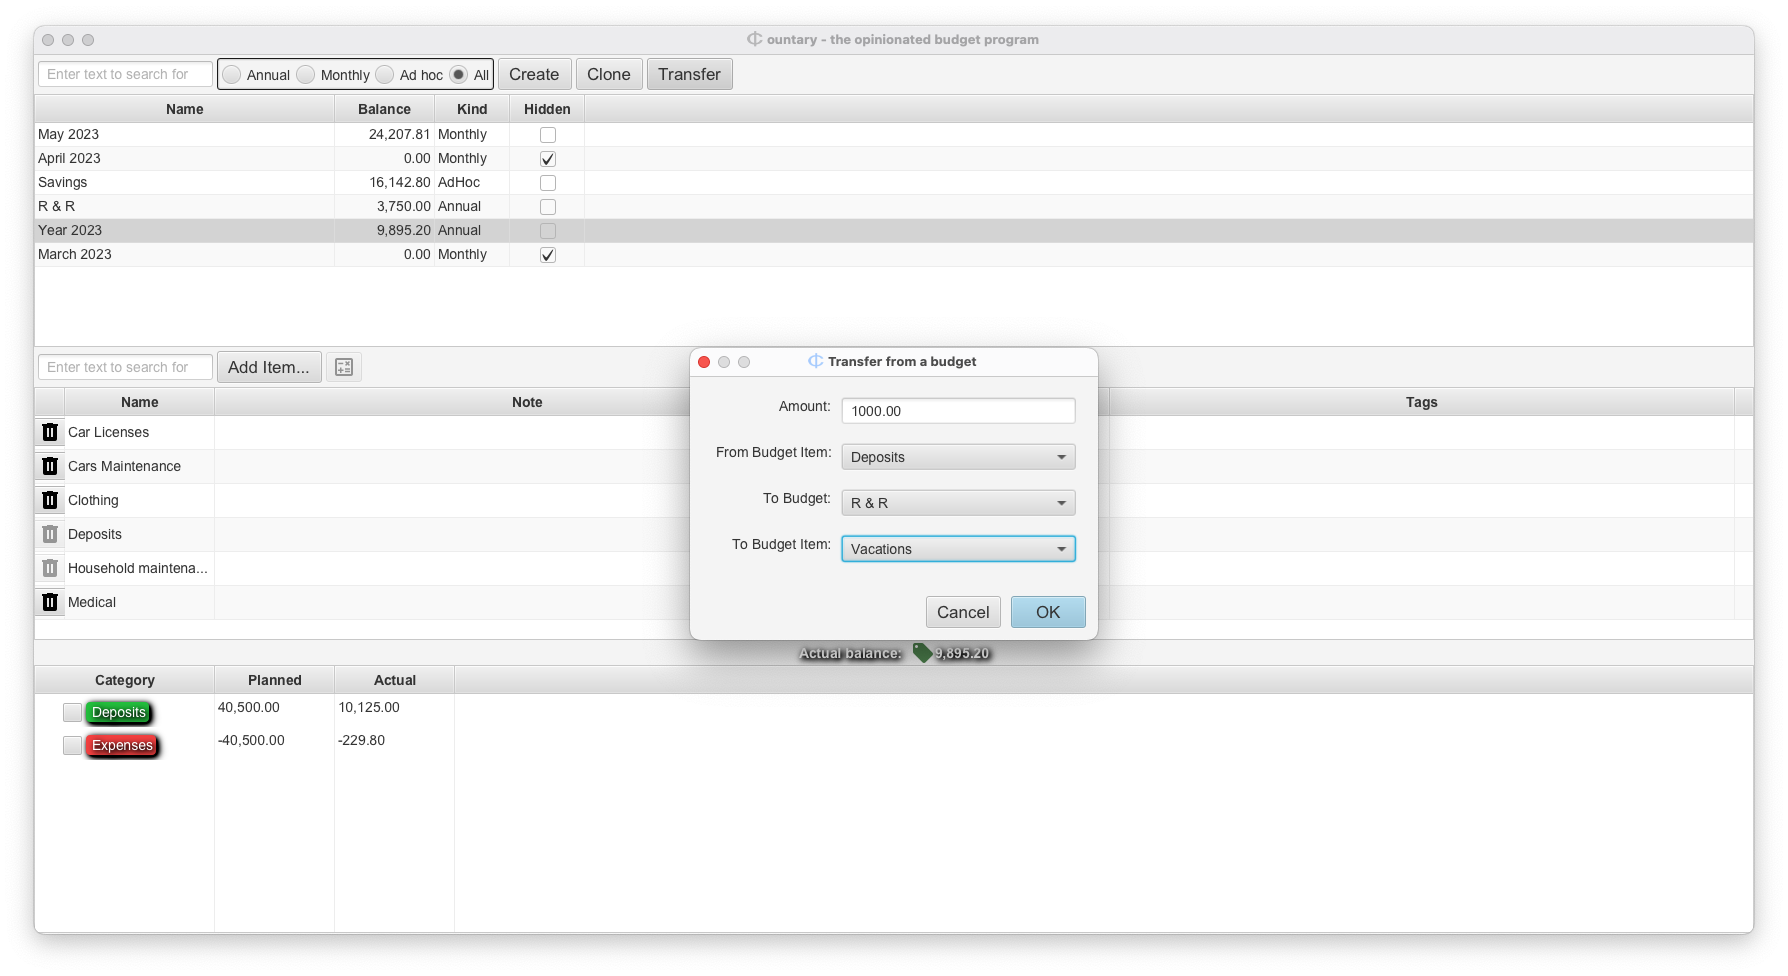
We’ve already covered how you can transfer the outstanding balance of a budget when you clone it. But what if you just wanted to transfer some funds to another budget? For instance, you might realise that some expenses that you budgeted for in your Year 2023 budget is not going to happen after all, and you’d rather have more funds available for a holiday?
What you need to do in this scenario is to go to the Budgets screen (using the Show Budgets menu item),
select the Year 2023 budget, and click the Transfer button that becomes available once a budget
is selected. Here you can see a screenshot for transferring an amount of 1000 to the R & R budget:
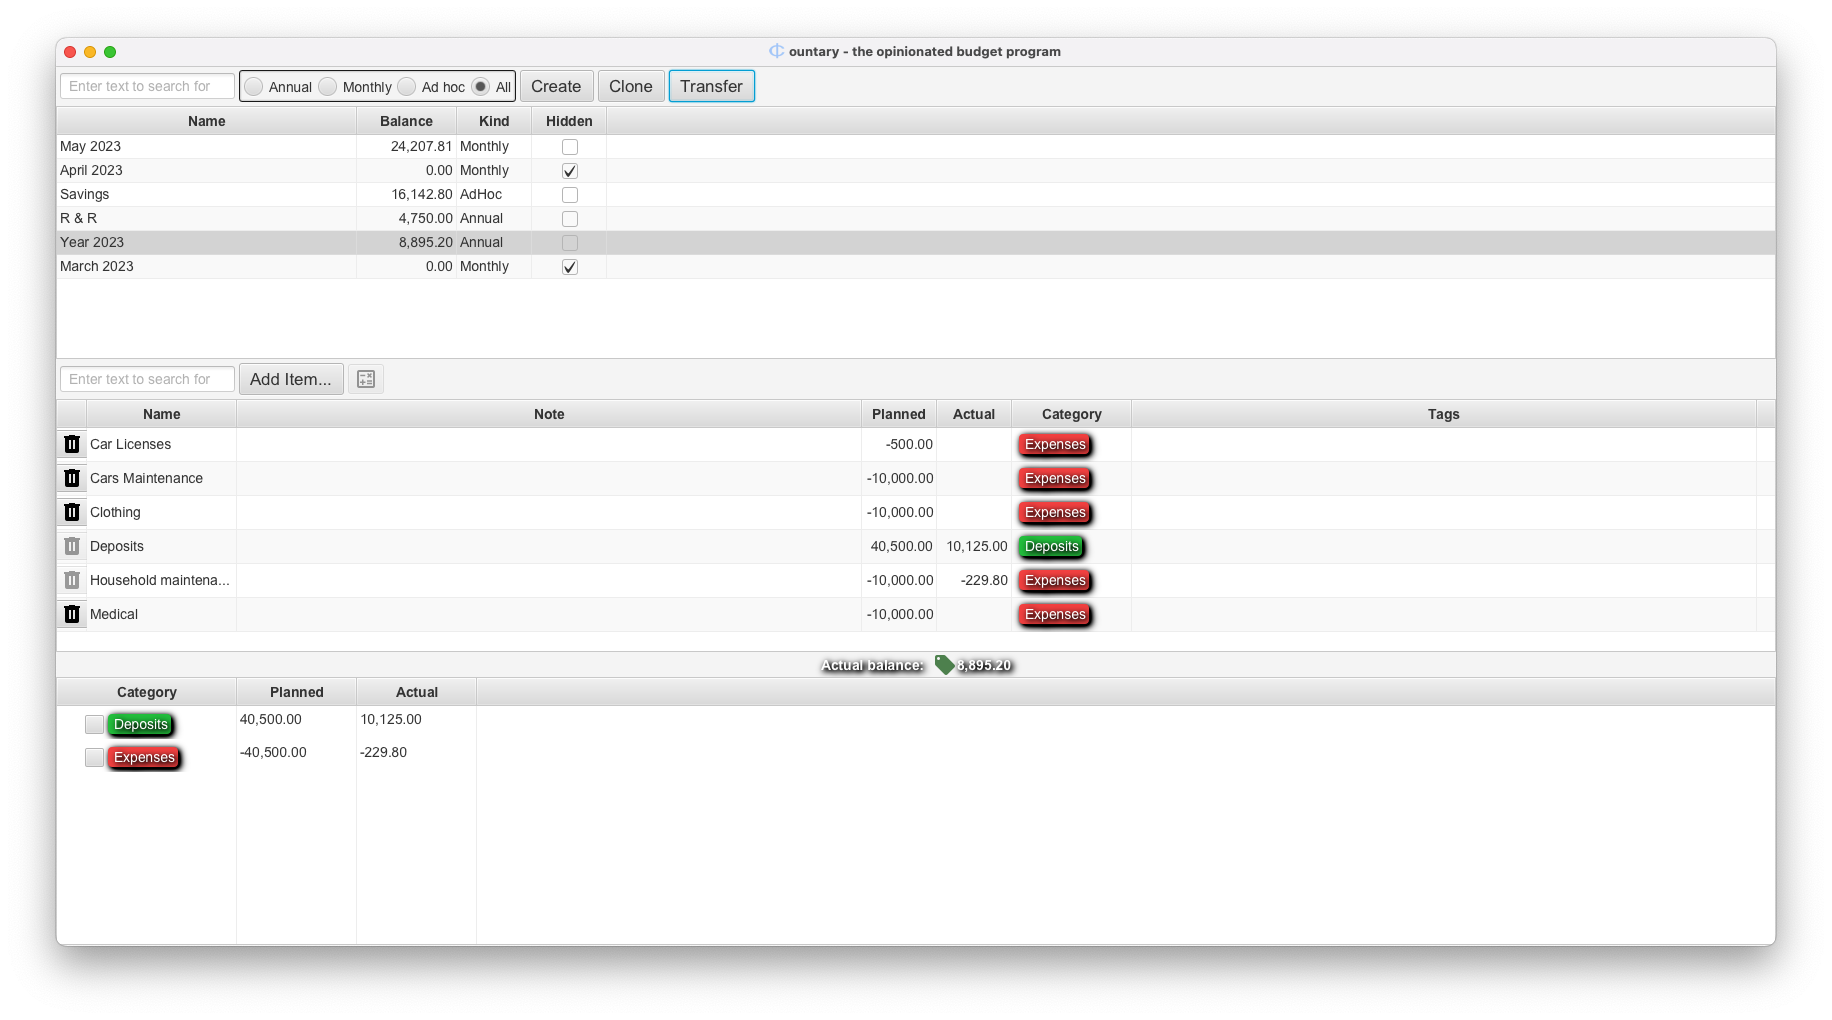
On the next screenshot you’ll notice that the balance for Year 2023 is a 1000 smaller and
the balance for R & R is a 1000 bigger!
When you have a budget with funding spread across more than one account, the transfer
dialog looks slightly different. For example, what if you needed to transfer funds from
your Savings to another budget? Here’s a screenshot showing what it looks like if you
transfer a 1000 from each account: 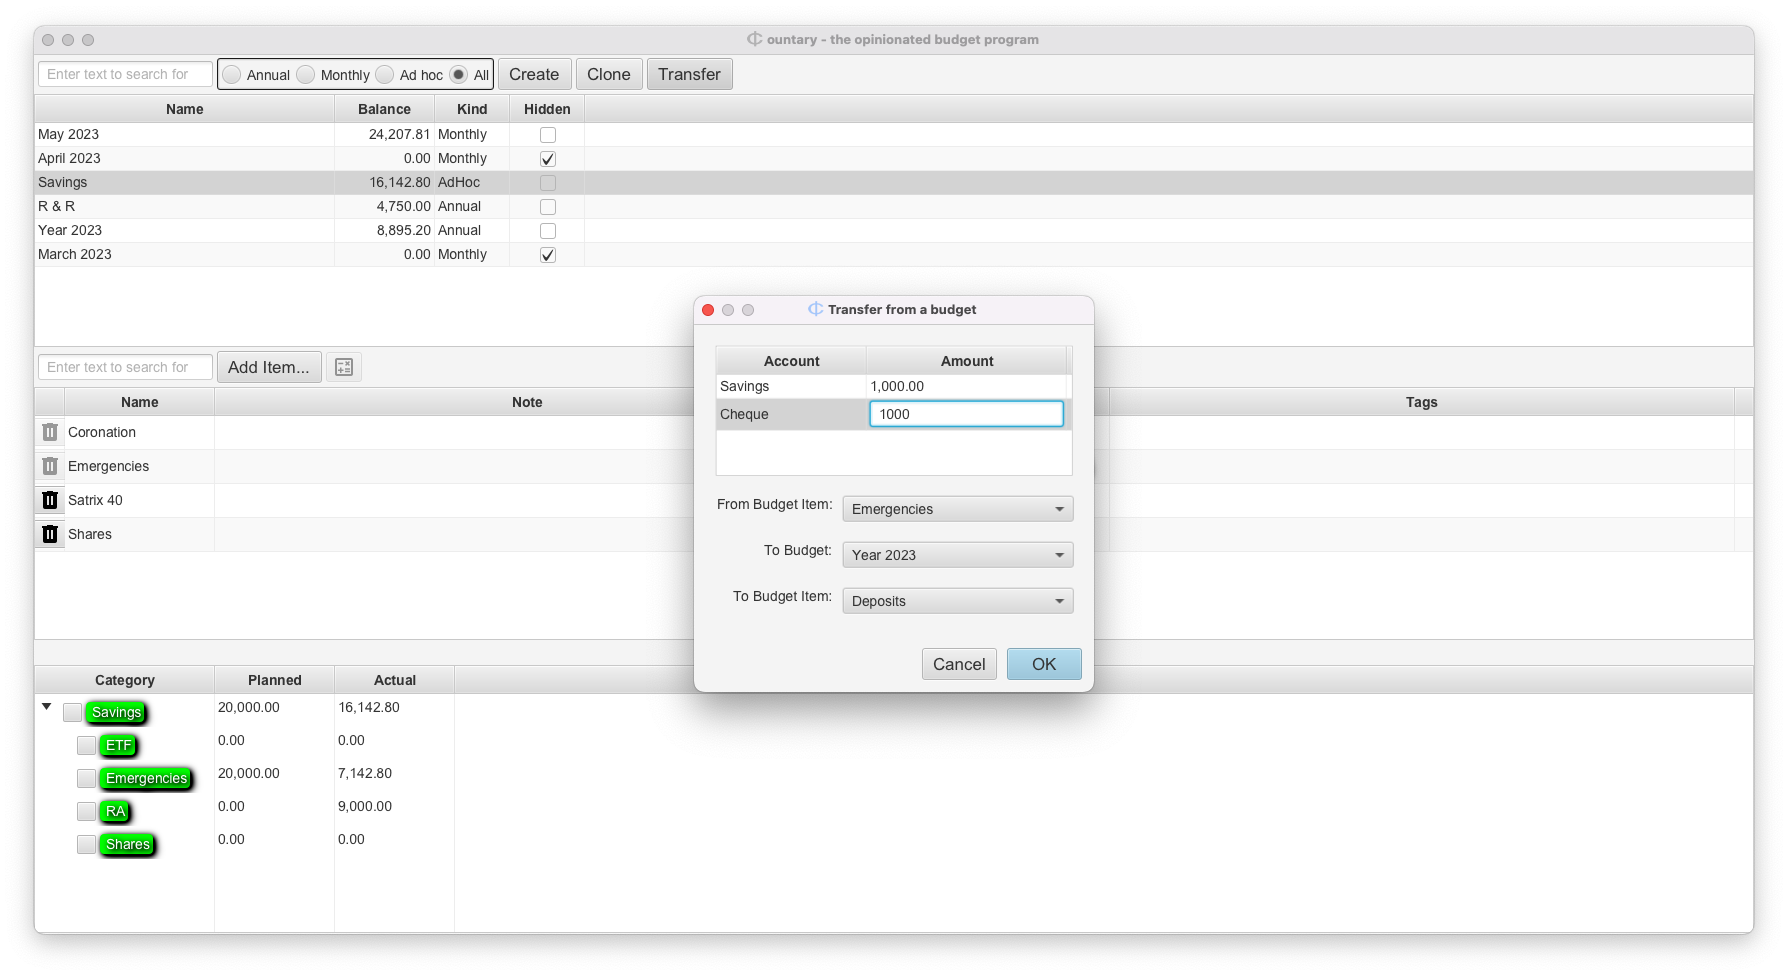
Back to User Guide